Getting Started with BricsCAD®: Installation
If you're wondering how to install BricsCAD® – look no further! Installing BricsCAD is easy; whether you're downloading the most recent BricsCAD release or an older version, this blog will walk you through the installation process, including interactive and silent installation options.
How to download BricsCAD®
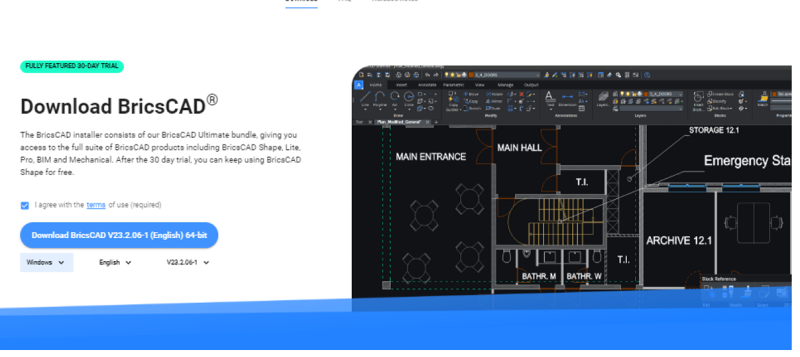
- If you haven't already, visit the Bricsys website, complete the registration process, and log in.
- Click on the "Download BricsCAD" button.
- Choose your preferred platform language.
- Tick the "I agree with the terms of use" checkbox.
- Click the "Download" button to begin the download.
Downloading an Older Version of BricsCAD®
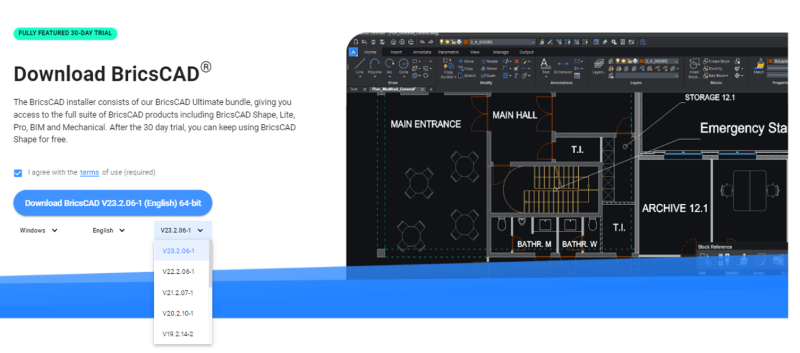
- Visit the Bricsys website, complete the registration process, and log in.
- Click on the "Download BricsCAD" button.
- Select your desired platform and language.
- Choose the specific BricsCAD release you want.
- Tick the "I agree with the terms of use" checkbox.
- Click the "Download" button to start the download.
Installation Options
BricsCAD® comes as a single download file that includes all license levels. Remember that when you install a new BricsCAD version for the first time, you can run a 30-day trial mode and install each new major version alongside a previous major version. You can install BricsCAD via interactive installation or silent installation (Windows only).
Interactive Installation
If you prefer a normal (non-silent) installation, follow these steps:
- Double-click on the BricsCAD installer file.
- Click "Next"
- Tick the checkbox to accept the License Agreement and click "Next."
- Choose the default installation folder or click "Change..." to select a custom folder.
- Click "Next" to proceed.
- Click "Install" to start the installation process.
- Decide whether to add a desktop shortcut and display the release notes after installation.
- Click "Next" and then "Finish" to complete the installation.
- BricsCAD is now successfully installed on your system.
Silent Installation (Windows Only)
For a silent installation, follow these steps:
- Ensure you have admin rights.
- Open PowerShell or Command Prompt and navigate (cd) to the location of the BricsCAD installer .msi file.
- In Windows 10, you can right-click a folder in Explorer, hold down the Shift key, and select "Open PowerShell window here" to quickly access it.
- Type msiexec /i and then choose one of the following options:
- Type the full file name of the BricsCAD installer (e.g., BricsCAD-V23.1.01-1-en_US(x64).msi).
- Drag the BricsCAD installer file from Windows Explorer to the command window.
- Type /qn in the command prompt.
- Type /norestart in the command prompt to prevent the system from restarting after installation.
- Additional options can be added to customize the installation process further (e.g., specifying a custom folder, activating the license)
- Press Enter to launch the silent installation.
For more options, type msiexec /? in the command prompt. You can find more information about the msiexec command on the Microsoft website.
Additional Options for Silent Installation
You can choose additional options for silent installation by adding entries to the command prompt.
If you don't want a desktop shortcut, add __ADDDESKTOPSHORTCUT="" __
Add SHOWRELEASENOTES="" if you don't want the release notes displayed when the installation is completed.
If you want to install BricsCAD in a custom folder, add __APPLICATIONFOLDER="your_app_folder" __
If you want to suppress a restart after the installation is complete, add __REBOOT=ReallySuppress __
Add BRXLICENSEDESTFILE="path_to_lic_file" to specify a folder for the license file if any of the properties BRXLICENSEKEY, BRXLICENSEFILE, or BRXLICENSESERVER are defined.
Add BRXLICENSEKEY="your_license_key" to activate the license and store it in the folder specified by BRXLICENSEDESTFILE. The default folder is APPLICATIONFOLDER\BricsCAD.lic.
Add BRXLICENSEKEY="your_license_key" to activate the license and store it in the folder specified by BRXLICENSEDESTFILE.
Add BRXLICENSEFILE="your_license_file" to copy the license file to the folder specified by BRXLICENSEDESTFILE.
Add BRXLICENSESERVER="host" or BRXLICENSESERVER="port@host" * to create a license file in the folder specified by BRXLICENSEDESTFILE, containing the server host specification.
- If your license server uses a different port than the default port 5053.
Here is an example of what a complete entry in the command prompt could look like:
msiexec /i "BricsCAD-Vxx.x.xx-x-en_US(x64).msi" /qn ADDDESKTOPSHORTCUT="" SHOWRELEASENOTES="".
And there you have it - you've successfully installed BricsCAD! Get up to speed quickly and check out our BricsCAD tips on the Bricsys Blog and our various tutorials on our YouTube channel.
Have you downloaded BricsCAD and have some ideas or suggestions?
Fantastic! We love hearing your thoughts on BricsCAD® – all feedback is welcome, whether good or bad. The best way to let us know what you think about BricsCAD is to send us a support request, and our support team will be happy to help.

