
You can create simple components like flange couplings quickly and easily in BricsCAD. Simply start with a 2D drawing and use BricsCAD's intuitive 3D tools to create your 3D model. Let's take a step-by-step look at how you can create a flange coupling.
Create a circular profile
- First, you'll need to create a circular profile

Draw a line starting from the center at a 45 degree angle from the horizontal
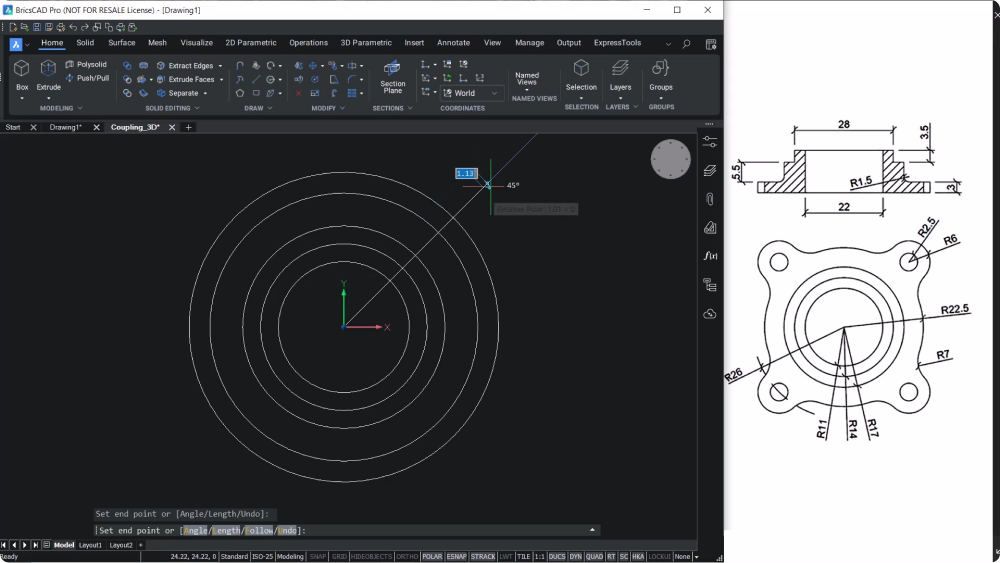
Create circles with the desired dimensions


- Erase the line and the outer circle
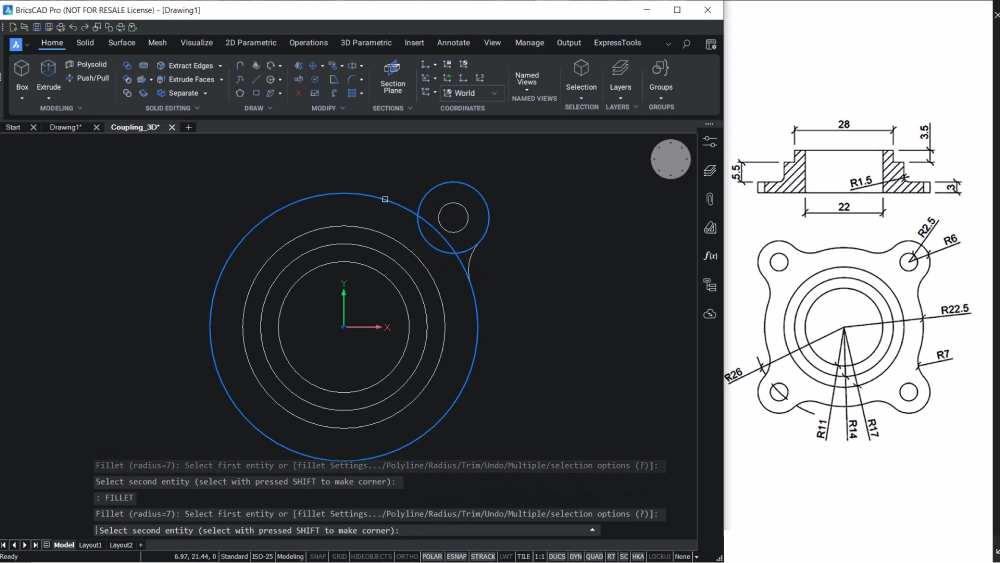
Create arcs
Fillet the circles to create arcs
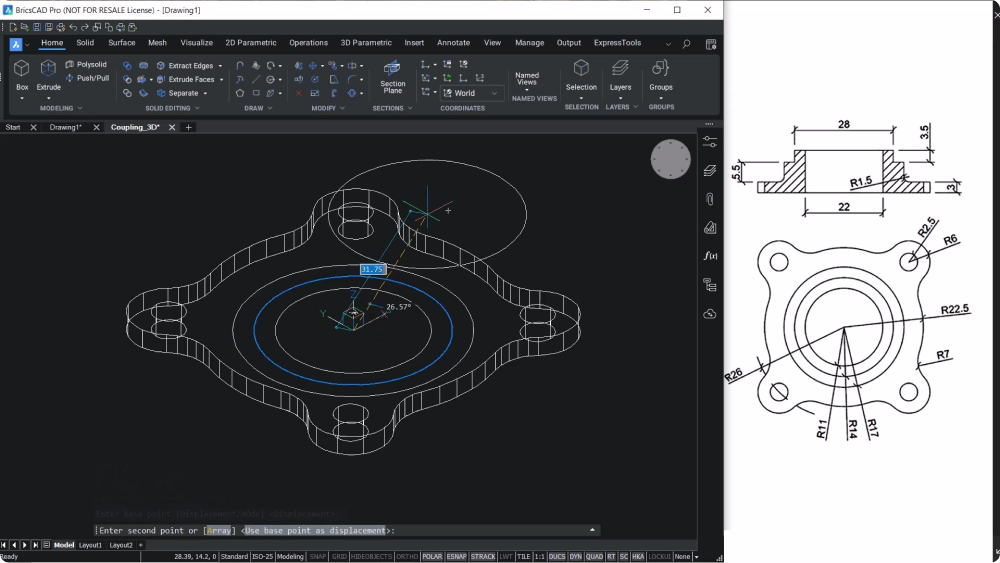
Choose polar array to copy the entities along the circumference of the circle, aligned with the radius.
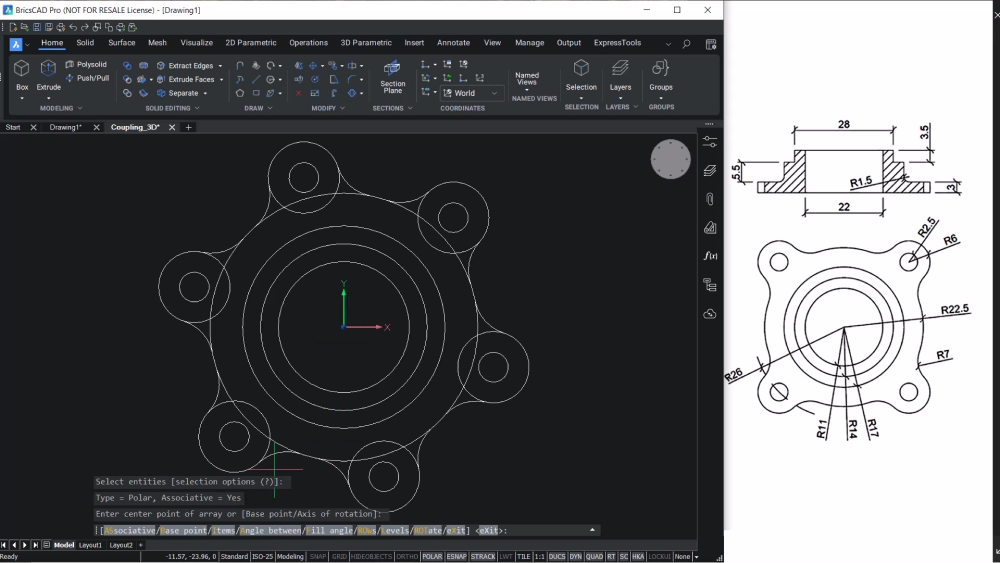


Arrays
Explode the array entity and use TRIM to remove unwanted portions of the entities
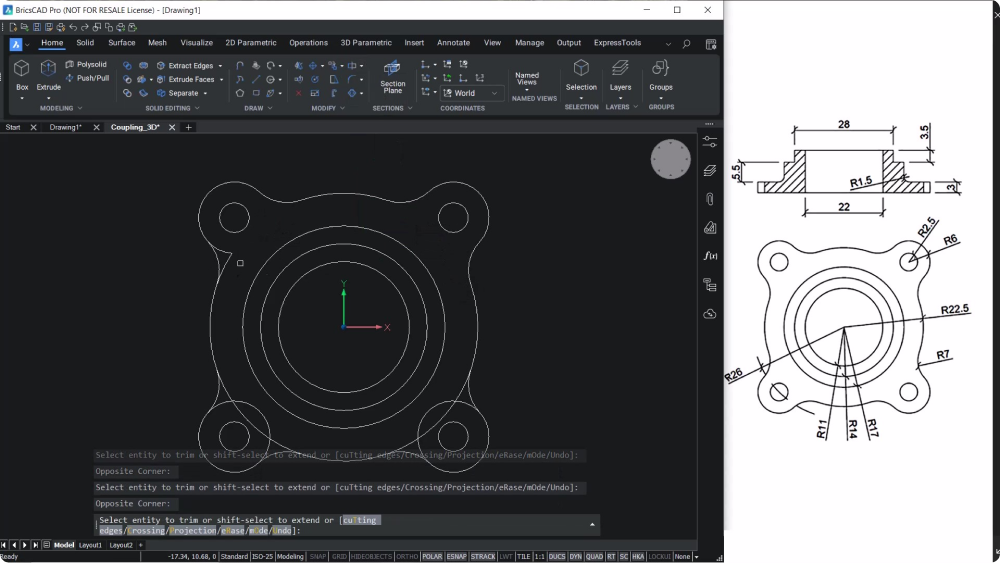
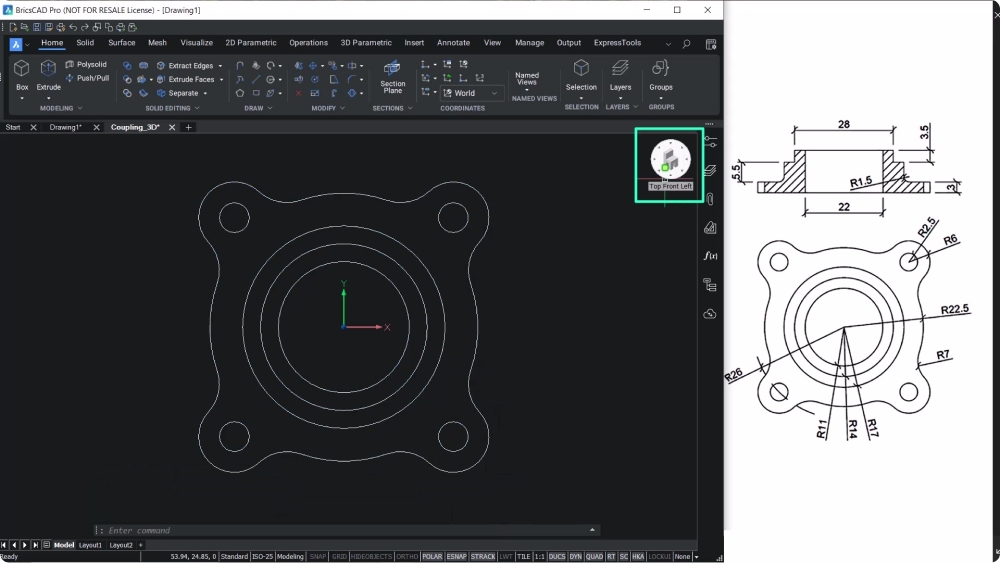
Join the outer profile to a single entity and take a top, front, left isometric view


Extrude
Use the EXTRUDE command to extrude the outer profile and the inner circles to a distance of 3 units and perform a subtraction

Copy the inner circle as you will need to use the circle twice while extruding
Extrude the outer and inner circles to a distance of 8.5 units, and subtract the outer solid from the inner solid
Extrude the remaining circles to a distance of 12 units and subtract the inner solid from the outer solid


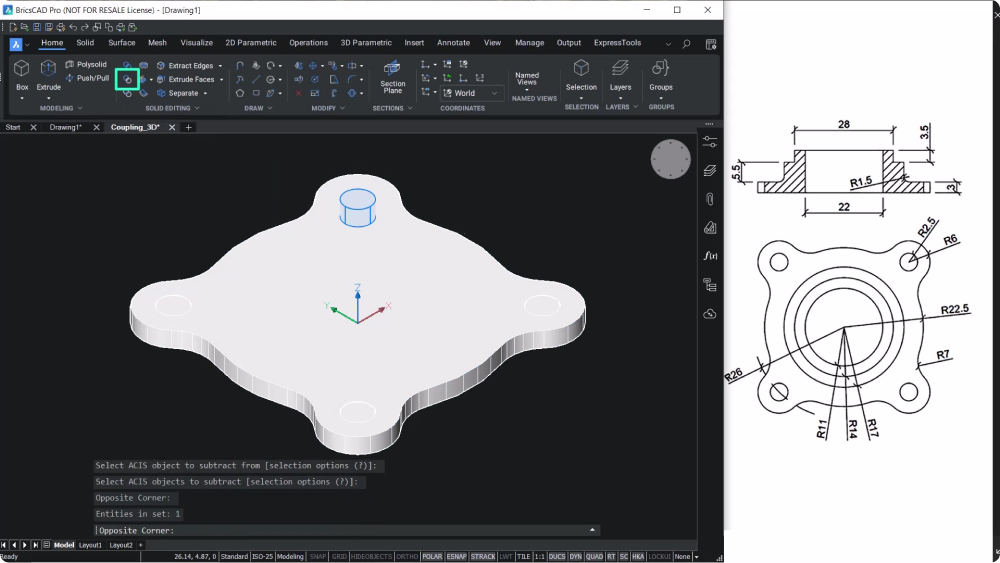
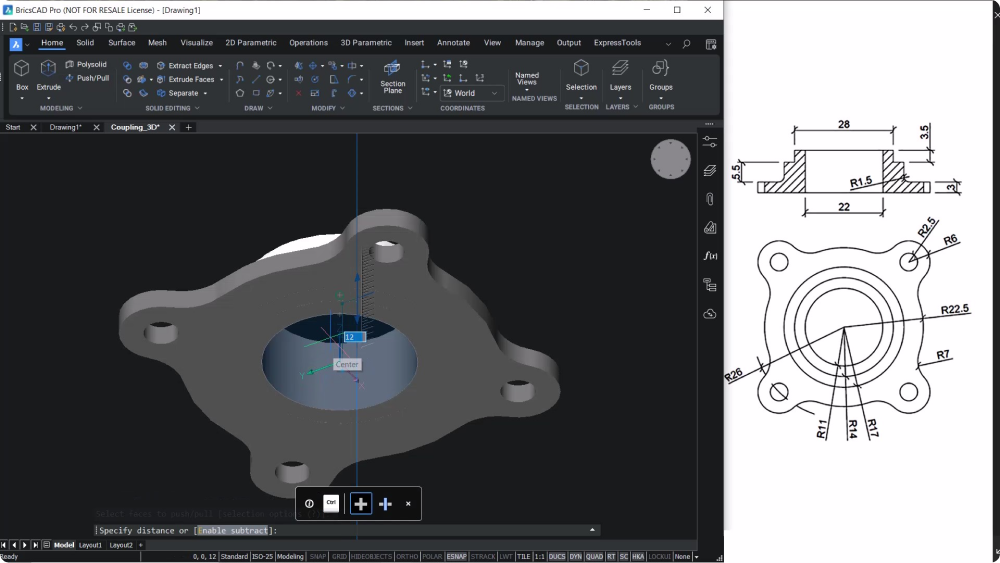
Create a hole
Take a bottom view of the component and use the Push/Pull tool
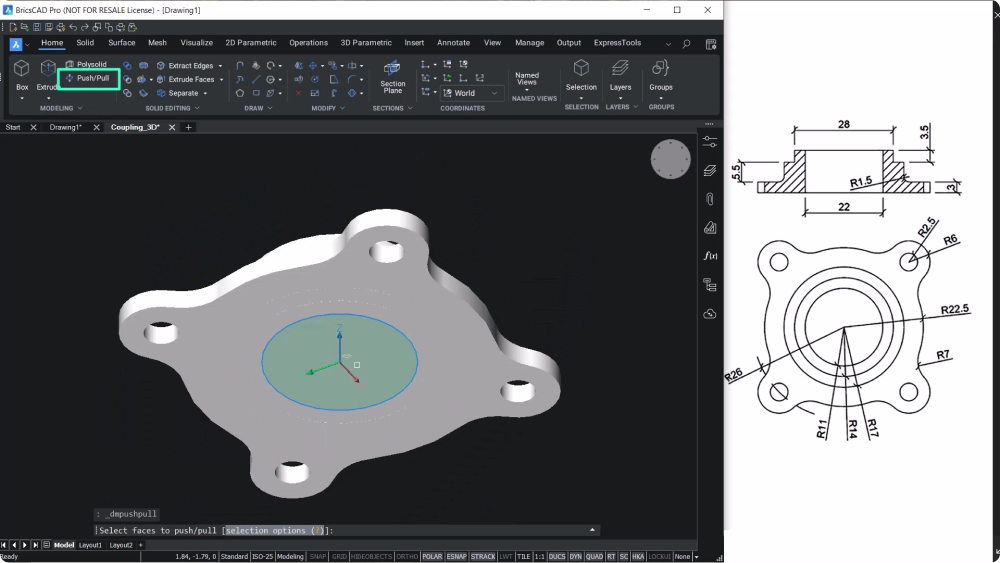
Pull the circular face upward from the bottom to create a hole


Final touches
Use the UNION command to union all solids to get a single solid
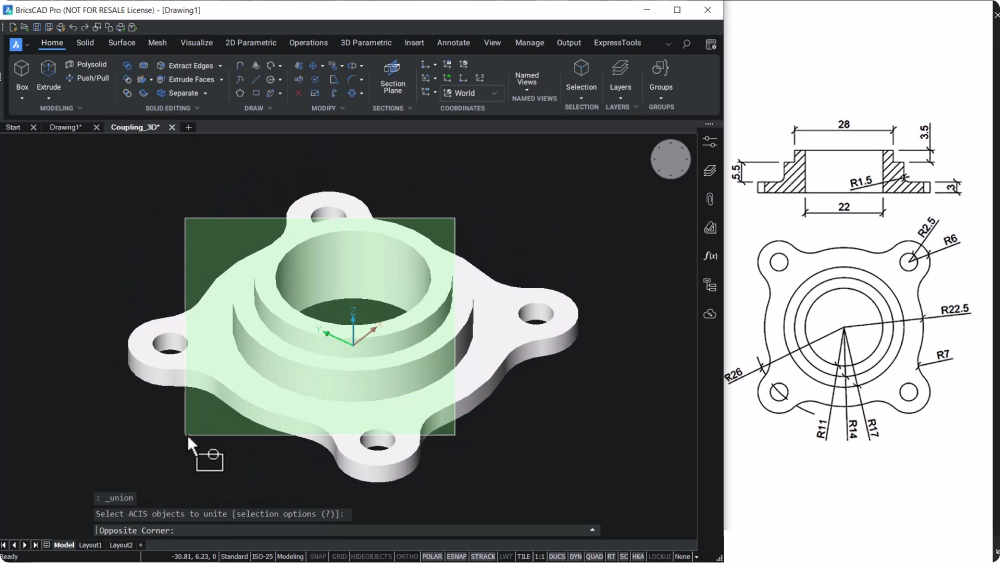
Create a fillet at the edge with a radius of 1.5 units


And that's it! Follow these instructions and you'll be able to create a flange coupling in minutes.
Watch the tutorial
If you prefer a video tutorial, check out this video on the Bricsys YouTube channel, and subscribe to our channel to keep up with our BricsCAD tutorials.
Try BricsCAD!
See how you can create 3D models quickly and easily for yourself, try BricsCAD for free for 30 days!
The Octave BricsCAD Team is committed to delivering you practical tips, tricks, how-to's, and industry insights - so you can make the most out of BricsCAD.


