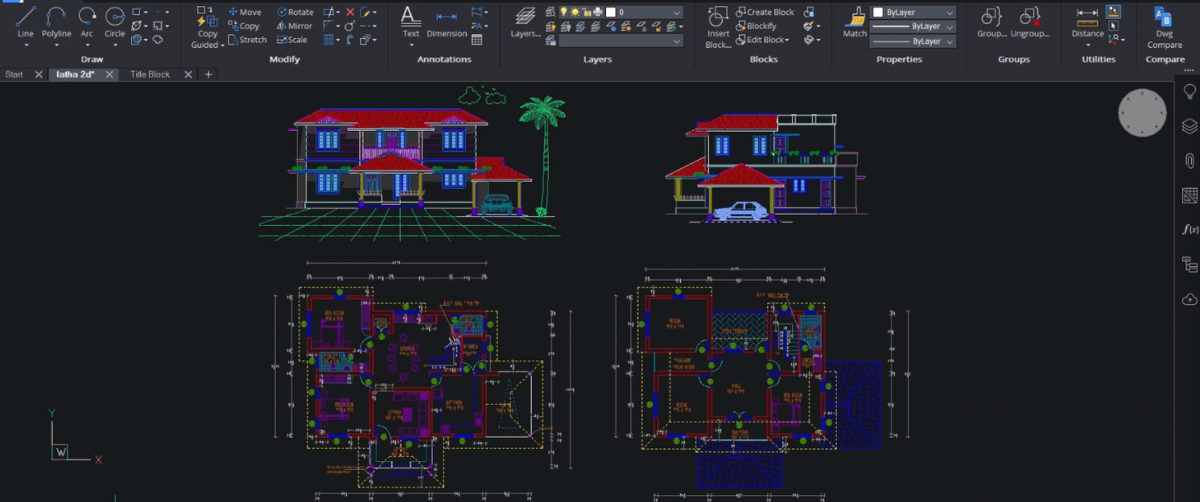
When printing in BricsCAD, there are two main interfaces to explore: Model Space and Paper Space. Model Space is a black screen wherein you create your 2D drawings and 3D models. In Paper Space we create layouts and are typically used to organize drawings for hard copy or soft copy printing.
When you open BricsCAD, you can see three tabs at the bottom of the workspace. By default, you will be in the Model Space. You can see the model tab is active and you can switch over to Paper Space by clicking on any of these layout tabs.
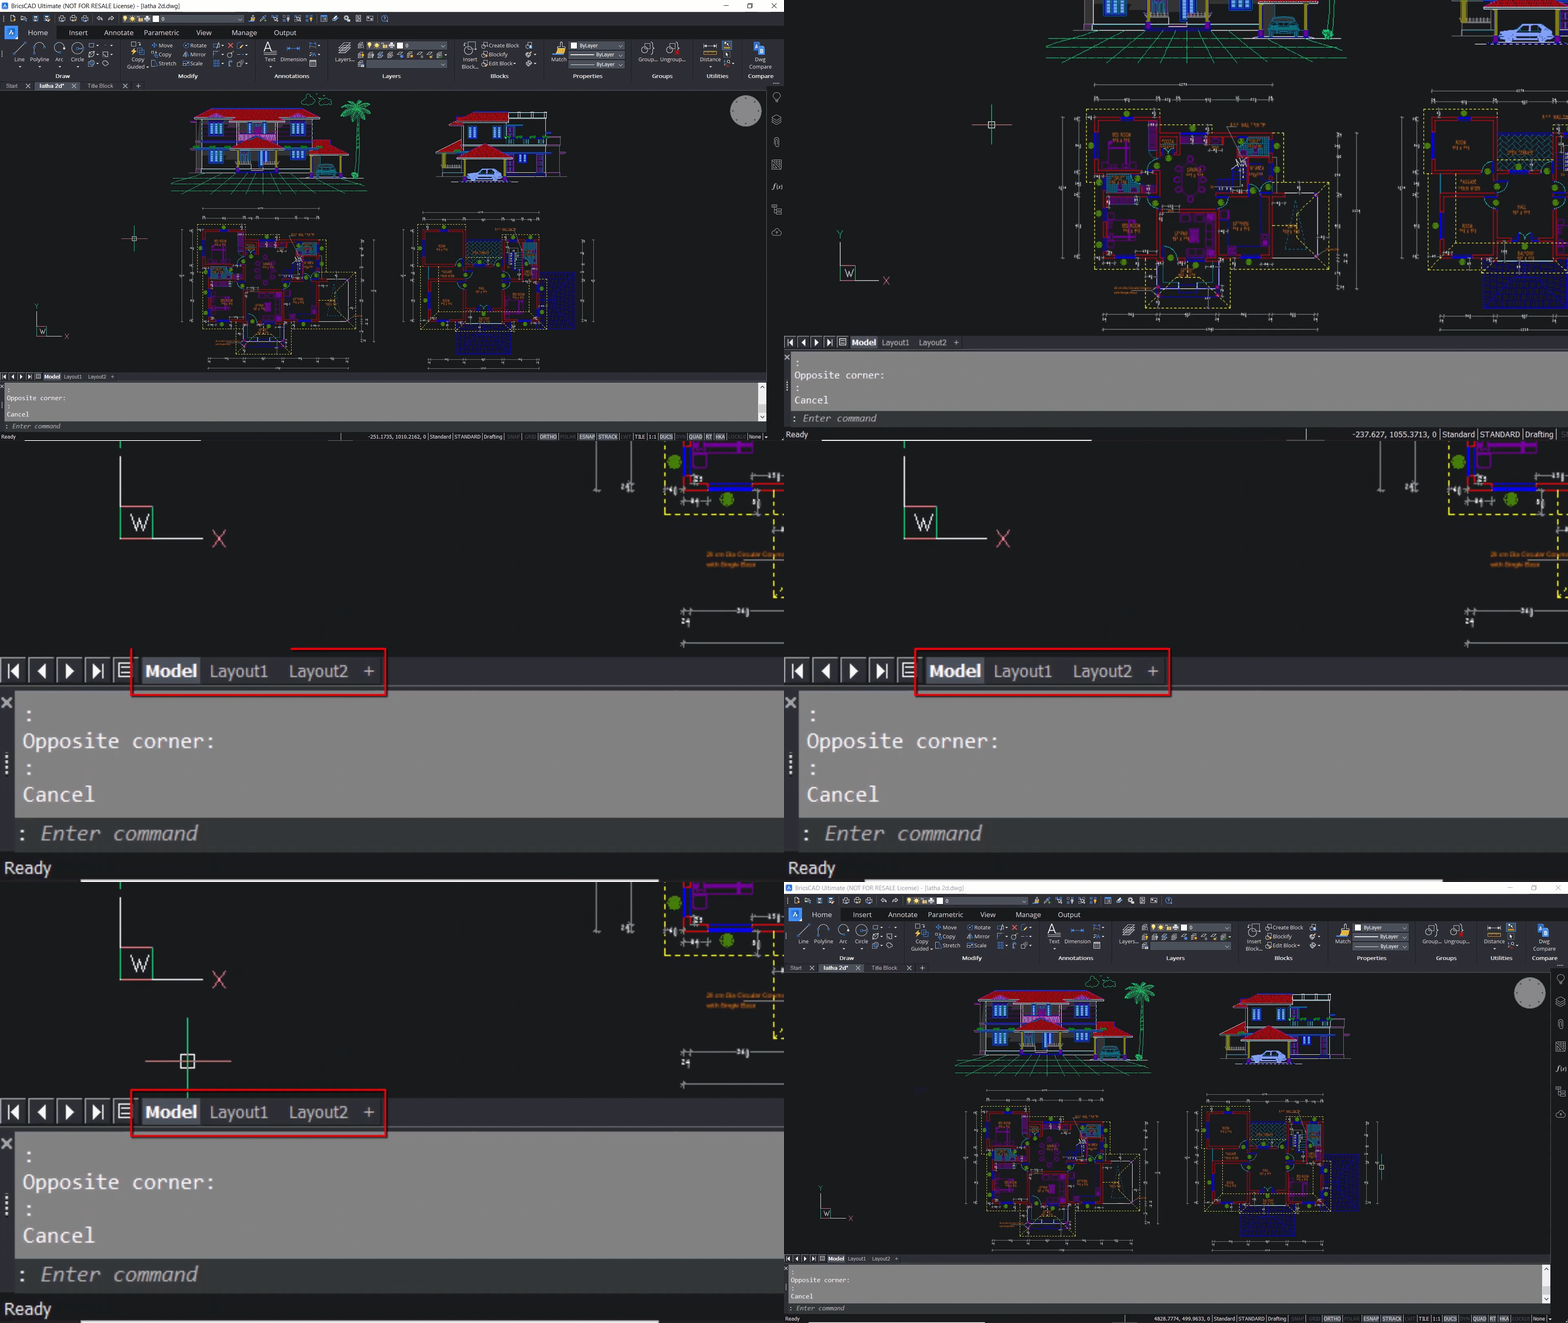
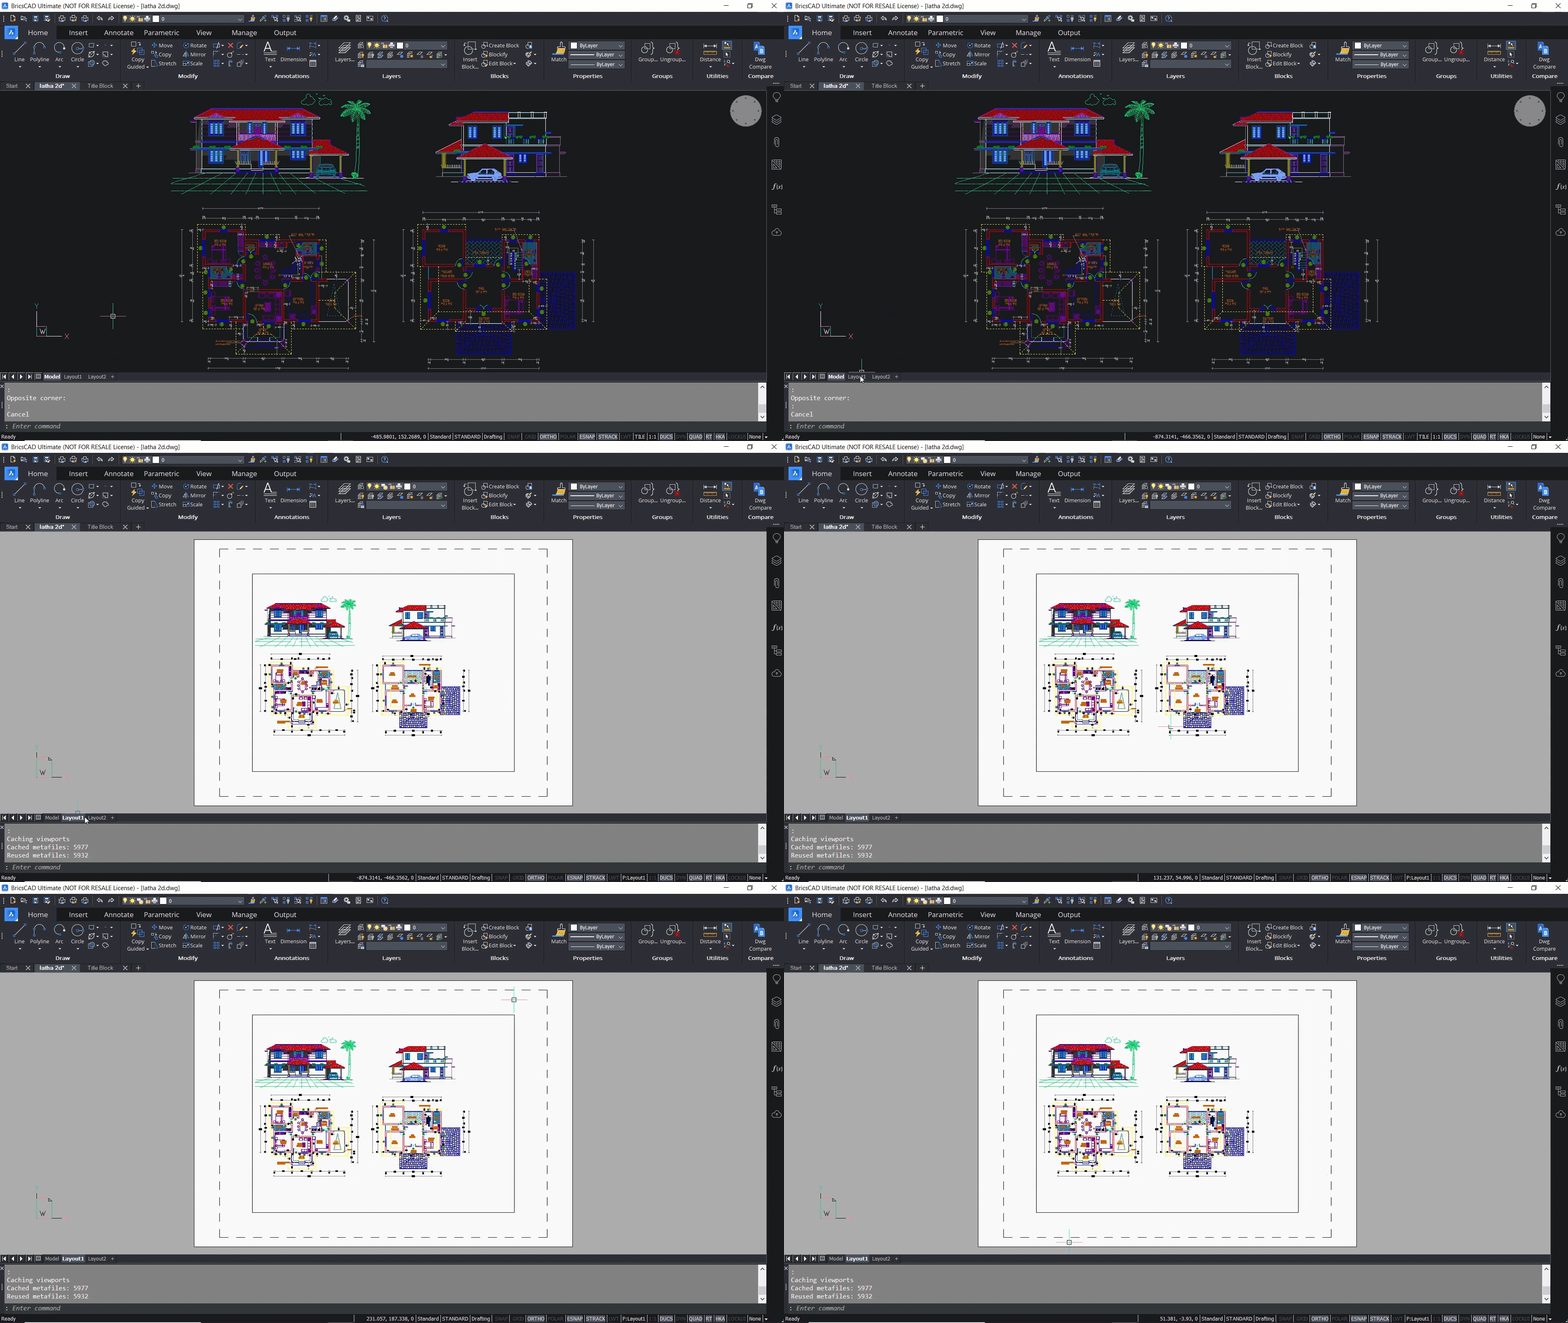
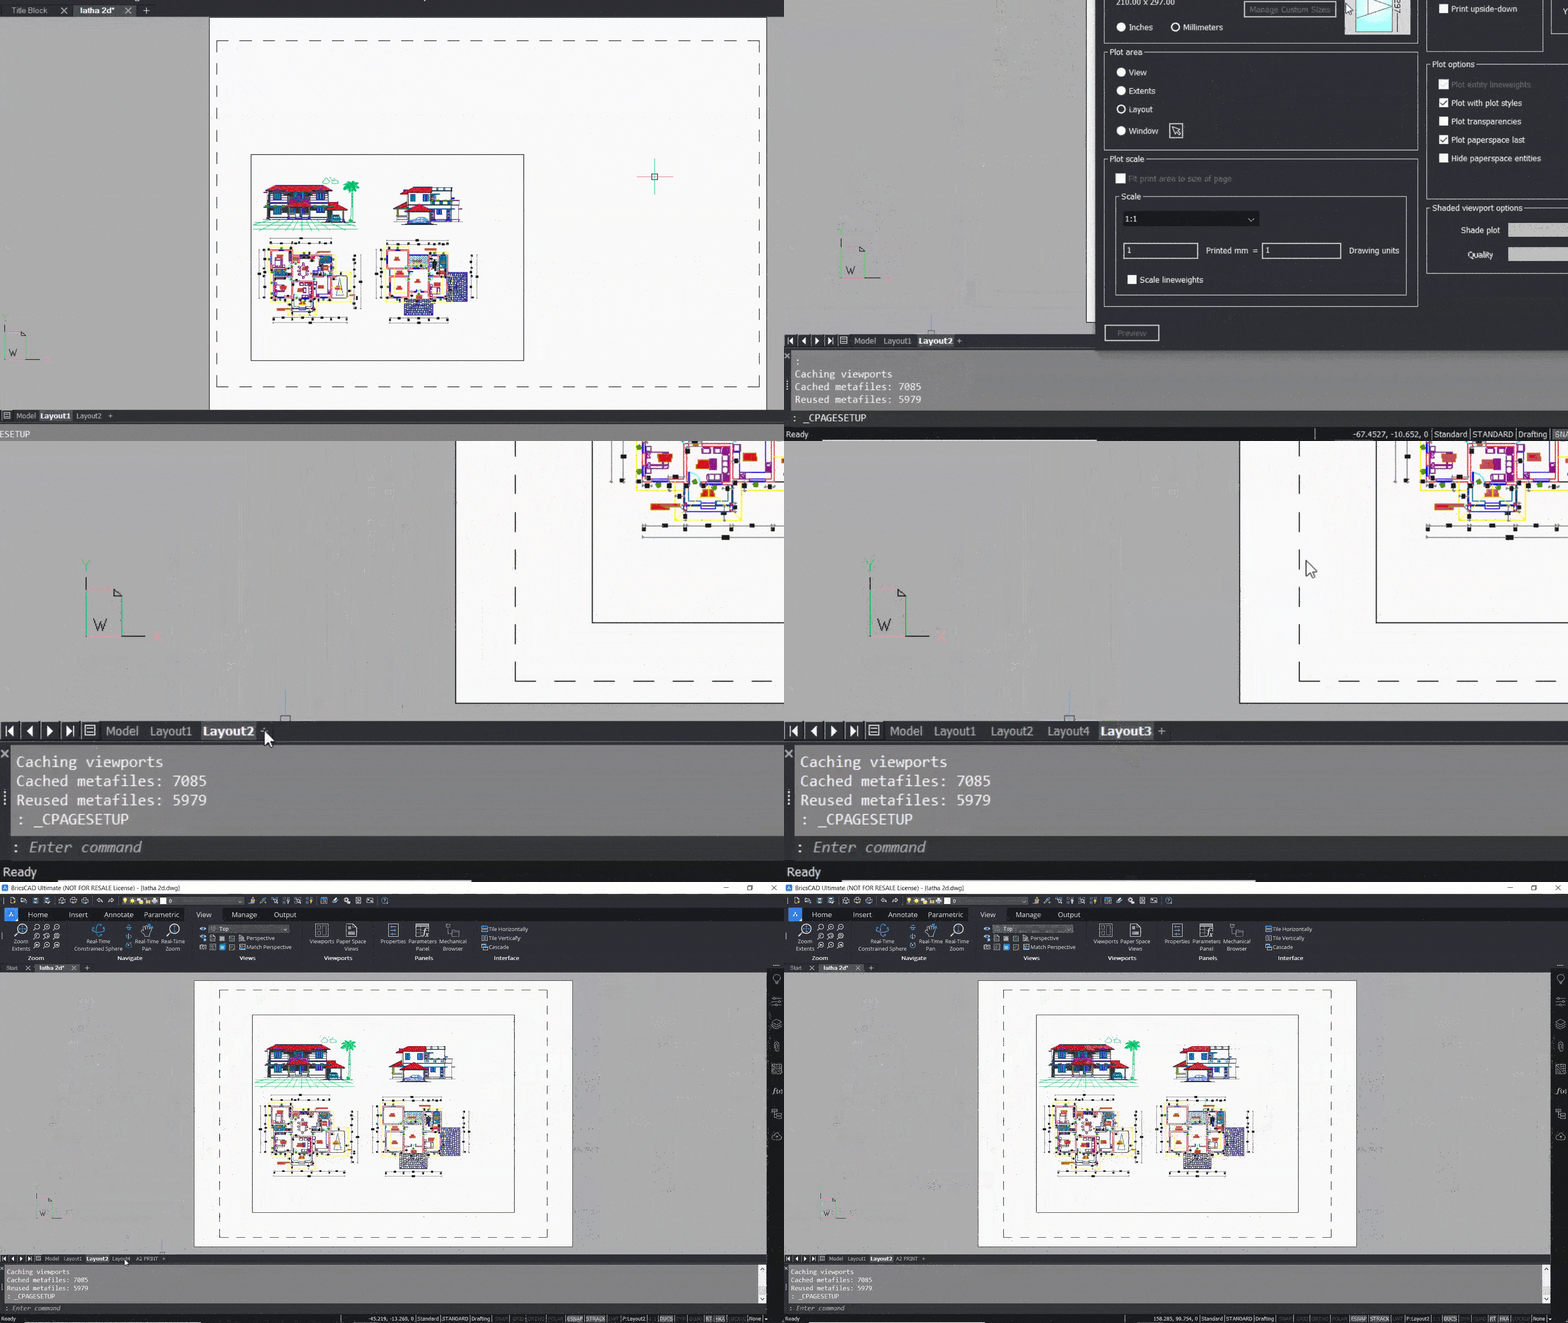
Next, you can select the 'Layout 1' tab to switch over to the Paper Space. This white screen is a representation of a sheet of paper where you can see your drawing opened in a viewport.
A viewport is an entity on the layout and is a window to the Model Space. Each layout can have a different paper size and varied properties such as plot style, table drawing orientation, printer configuration, etc. You can select the right layouts to properly communicate your unique design.
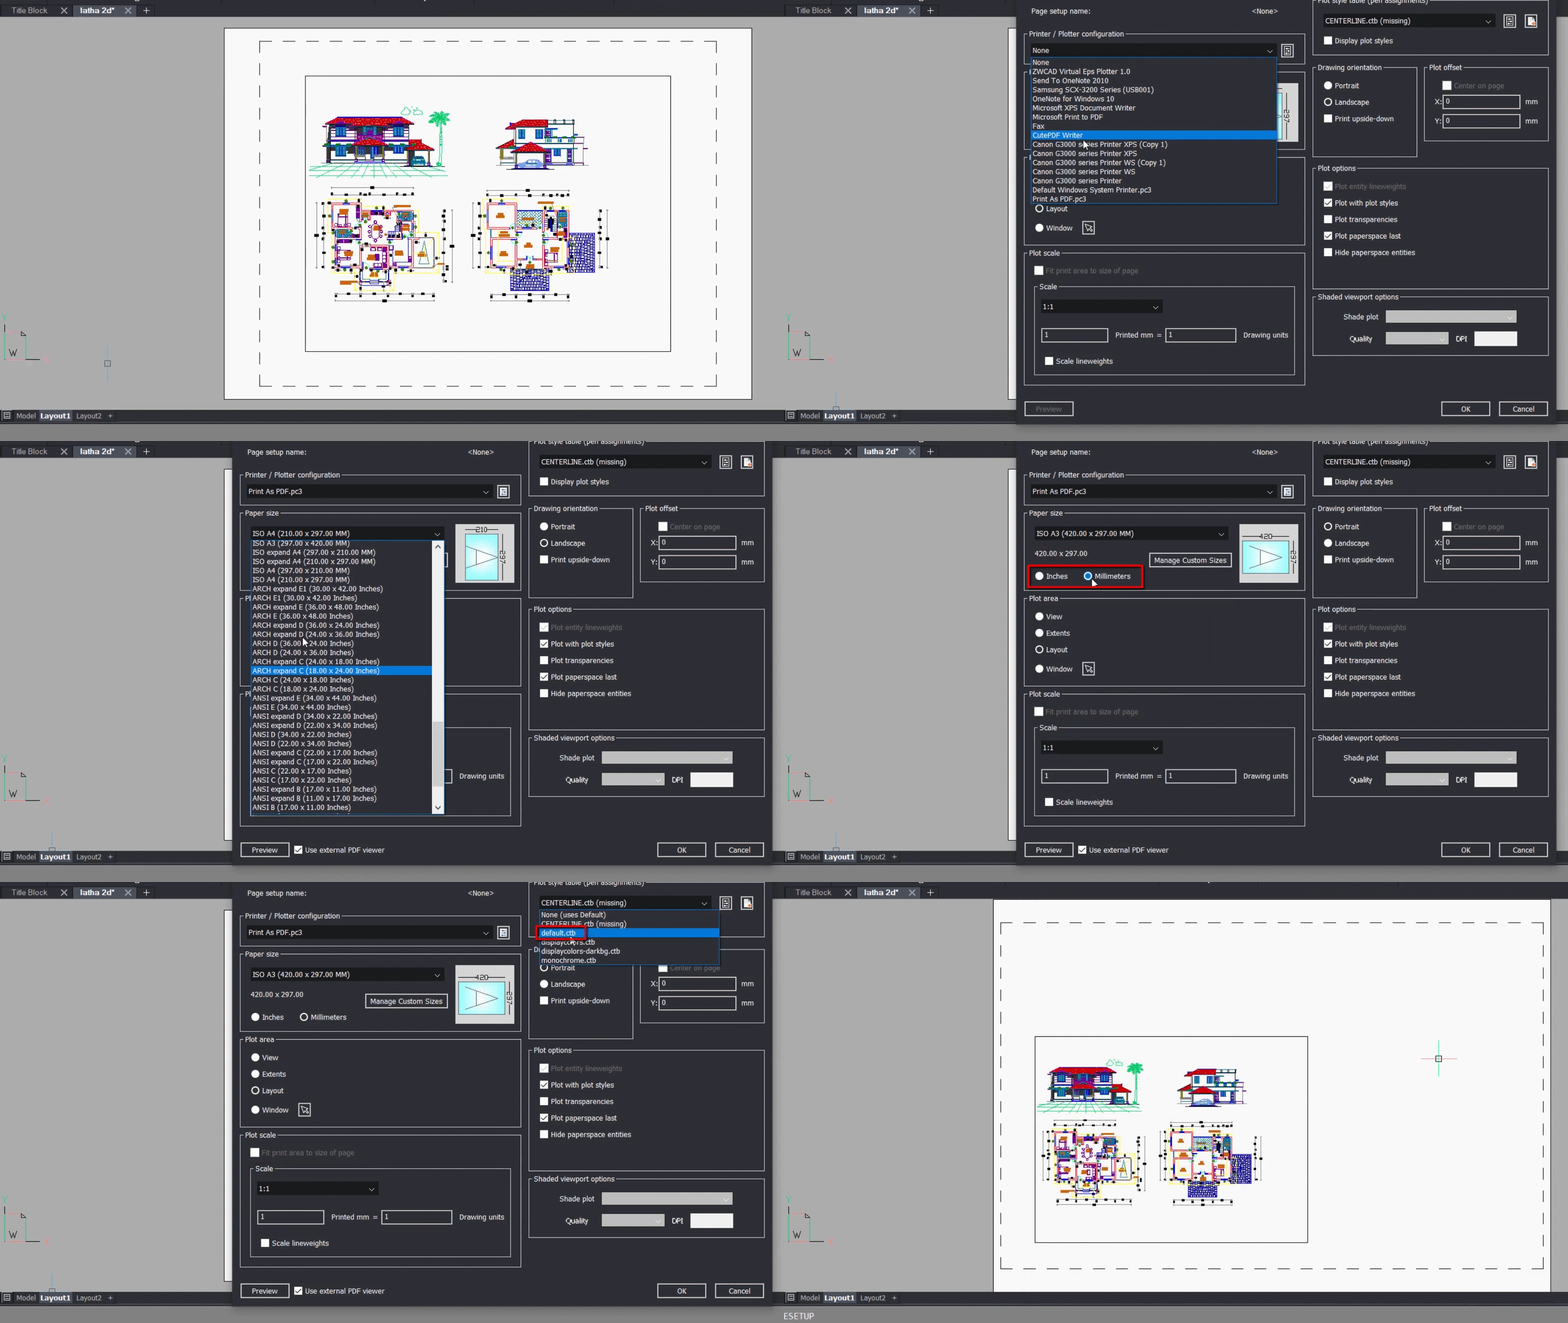
Let's change the properties of Layout 1. To do this, you'll need to right-click on 'Layout 1' and click on 'Page setup'. In the printer plotter configuration, you will get a pop-up list in which different plotters are listed. Click on 'Print as pdf' to get a pdf soft copy output, and in the paper size popup choose a suitable paper size depending upon your requirements. Here we've clicked on 'iso A3' to plot to an A3 size paper. You can change the units to inches or millimeters. We've selected millimeters and a plot scale of 1:1.
Next, you'll need to click on the plot style table pop-up and choose 'Default.ctb'. Select 'Landscape' to get a landscape drawing orientation, and then select 'OK'.
To finish, you'll click on 'Layout 2', right-click and go to 'Page setup'. Here you can change the parameters of this layout. You can create as many layouts as you want by clicking on the plus sign. To rename a layout, right-click on the layout tab and select the 'Rename' option to give your layout a suitable name.
To delete a layout you'll need to right-click on the layout tab and select the 'Delete' option.
Now you know the basics of printing, the different layouts in BricsCAD, and how you can use them to navigate and communicate your unique design! If you'd like to know more, you can view the full video.

