
Last week, I showed you how to get started with BricsCAD's free CAD library. Stay tuned this time to learn how to create your own components or use open-source models. There are still many, many more ways of working in BricsCAD, but this should give you a good starting point.
New commands covered:
- Create Components
- SUPPORTFOLDER
For access to the free CAD library, you will need BricsCAD BIM or BricsCAD Mechanical.
Creating a single component from existing files
I created a new folder for my new components. Then I created components from some of the previous projects we have covered in this series, using the Create Components button. It's really that simple.
To do this:
To begin, for BIM navigate to this file location (you can use the SUPPORTFOLDER command):
C:\Users\USERNAME\AppData\Roaming\Bricsys\BricsCAD\V19x64\en_US\Support\Bim\ComponentsMechanical components can be found here:
C:\Users\USERNAME\AppData\Roaming\Bricsys\BricsCAD\V19x64\en_US\Support\DesignLibraryRight-click 'Add new folder'.
Give the folder a sensible name, in this instance, the folder is named 'house elements'.
Start BricsCAD.
Open the file that you wish to convert to a component. In this example I am using the shower from part 5.
In the Components panel click the blue 'Create component' button at the bottom right of the workspace.
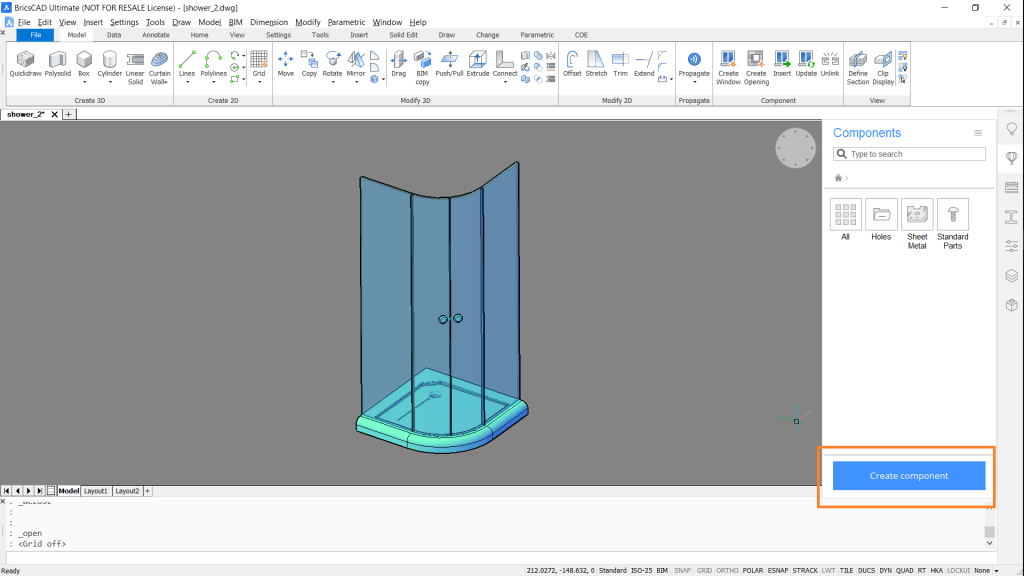
The 'Create Components', large, blue button indicated by the orange rectangle.
The following dialog box is displayed:
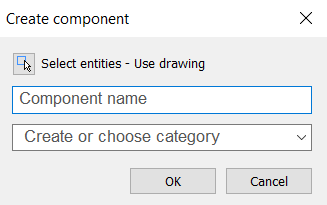
Type in the name, choose the category to add to and hit 'OK'.
The new component has now been created in the correct folder. A thumbnail has automatically been generated.Repeat as many times as required.
Note: You can also do this with models that are made from blocks and other components, in this instance, I have used the toilet from part 7.


Left: In the Structure browser you can see that the CAD file includes CAD blocks. Right: The CAD file, including sub CAD block components, has been added to the parts library.
Create a component from a section of a model
This time I selected just a section of the kitchen from part 3.
To do this:
Open the drawing.
In the Components, panel click the blue 'Create component' button at the bottom right of the workspace.
This time select the small, 'Select entities' button in the top left of the dialog box.
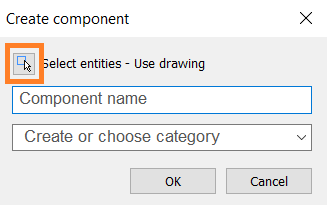
Click the button highlighted in orange to select a section of the model.
Use a selection box to select the elements of the model to turn into a component.
Type in the name, choose the category to add to and hit 'OK'.
The new component has now been created in the correct folder. BricsCAD automatically generates a thumbnail.


Notice only a section of the current model has been converted into a CAD block.
Manually add components to your library
This time I simply dragged and dropped an existing .dwg file into the folder directory. You can open any "AutoCAD block" .dwg, .rfa, and .dxf files and, import .skp. The component used in this example was created from an open-source file. I used the Communicator for BricsCAD to import the .stp file.
Some websites with free CAD components:
- BiblioCAD -- Huge range of free 2D and 3D CAD blocks.
- BIM&CO -- Huge selection of components, including IFC and BIM specific files from manufactures.
- IKEA Data Set -- Full IKEA data set.
- CAD Details -- Large library of free .skp and .dwg files, may of which are in 3D.
- GrabCAD -- Large number of CAD models available for free. Many of which are available in .skp and .dwg formats.
- Polantis -- CAD models available in a range of file types, from some top manufacturers. Most are free, others have a small fee.
- Thingiverse -- CAD models available in a range of file types, from some top manufacturers. Most are free, others have a small fee.
- NIH 3D Print exchange -- Medical specific, open-source CAD software.
To do this:
Navigate to the following file location (you can use the SUPPORTFOLDER command):
C:\Users\USERNAME\AppData\Roaming\Bricsys\BricsCAD\V19x64\en_US\Support\Bim\ComponentsMechanical components:
C:\Users\USERNAME\AppData\Roaming\Bricsys\BricsCAD\V19x64\en_US\Support\DesignLibraryCopy and paste the file into the folder.
Open up BricsCAD. The file will be available, however, there will be no thumbnail.

Although the component can be inserted, no thumbnail is created, instead a circle with a '?' is displayed.
Adding a thumbnail
Create two .png images. One of 60×60 and one 120×120. Name them the exact same name as the component you want the image to match to. In this instance the component is named 'les_paul'.
Go to the following folder location:
C:\Users\USERNAME\Roaming\Bricsys\BricsCAD\V19x64\en_US\Support\Bim\Components\.resources\FILENAMEMechanical Components:
C:\Users\USERNAME\AppData\Roaming\Bricsys\BricsCAD\V19x64\en_US\Support\DesignLibrary\.resourcesHere you'll find two folders: 'thumbnails' and 'thumbnails_x2'.
In file labeled 'thumbnails' add the 60×60 .png file.
In file labeled 'thumbnails' add the 120×120 .png file.
Open up BricsCAD, the thumbnail will now be displayed.
Note: If BricsCAD is already open you will need to restart it for the changes to take effect.

The new thumbnail is now displayed.
Finishing Up
When you've finished these components can be added to your project, just like any of BricsCAD's Standard library of free parts.
Next Time
Join me next time when I show you how to make a rubber duck for the bathroom.
Don't have BricsCAD yet?
Easy to try, easy to buy, easy to own. That's BricsCAD. Try all of our products, for free for 30 days at www.bricsys.com. Freedom of choice, plus perpetual (permanent) product licenses that work with all languages, in all places. You'll love what we've built for you with BricsCAD.
Keep Reading
- Moving from 2D to 3D CAD
- 3D Drawing from engineering plans
- Drawing everything but the kitchen sink
- More Advanced Modeling
- The Shower
- The Sink
- The Toilet
- Walls and Floors
- The Roof
- Windows and Doors
- Create your own components
- Rubber Duck
- Laser-cut puzzle project
WARNING: Do not change the source files unless you are well experienced. Changes to the App files may result in the corruption of BricsCAD and may require reinstallation. Bricsys takes no responsibility for this.
Note: This series is intended as a guide to demonstrate how to use different aspects of 3D modeling tools. It may not always demonstrate the fastest way of getting the result. Keep coming back to see if we cover a faster technique at a later date.
Disclaimer: All brand names and product names mentioned in this post are trademarks or service marks of their respective companies, including AutoCAD.
These links are being provided as a convenience and for informational purposes only; they do not constitute an endorsement or an approval by Bricsys of any of the products, services or opinions of the corporation or organization or individual. Bricsys bears no responsibility for the accuracy, legality or content of the external site or for that of subsequent links. Contact the external site for answers to questions regarding its content.
*
*

Rose is responsible for taking user feedback and improving the BricsCAD product. Before coming to BricsCAD, she was a CAD user and worked in the Automotive, Aerospace, and Defense industries as a Technical Illustrator. She loves finding out how things work, taking them apart, and (hopefully) putting them back together again.
