The new automation tools included in BricsCAD® BIM V24 make the Scan-to-BIM process easier and more efficient! If you want fast and accurate reality capture of existing objects, these tools will be a great addition to your arsenal. We've added tools like the Point Cloud Classifier, Point Cloud Detect Rooms, Point Cloud Fit Rooms, and Normal Calculation for structured point clouds to help you create digital twins for quantity takeoff, create accurate building plans, and with facility management.
Scan-to-BIM made easy in BricsCAD® BIM V24
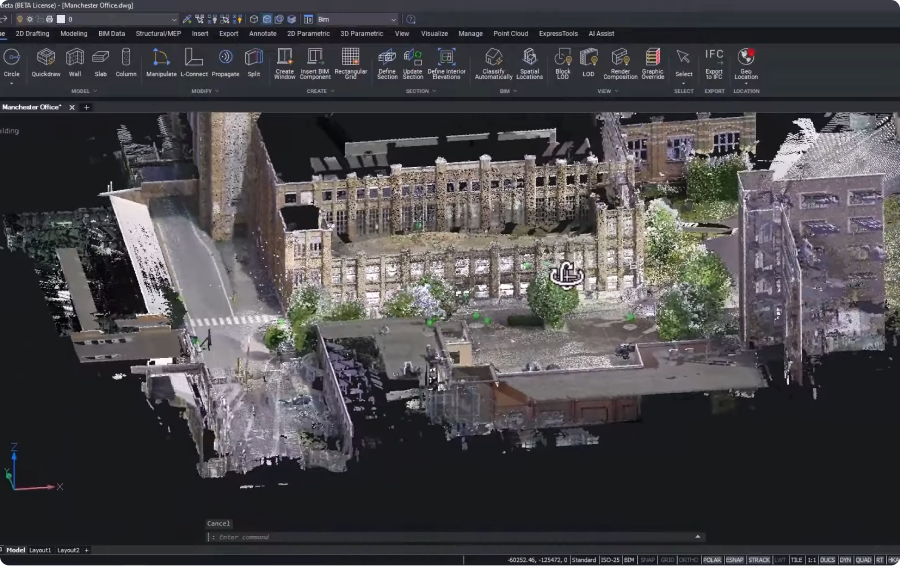
For this example, we captured this point cloud of a building for renovation using the Leica RTC 360 Scanner and imported it into BricsCAD.
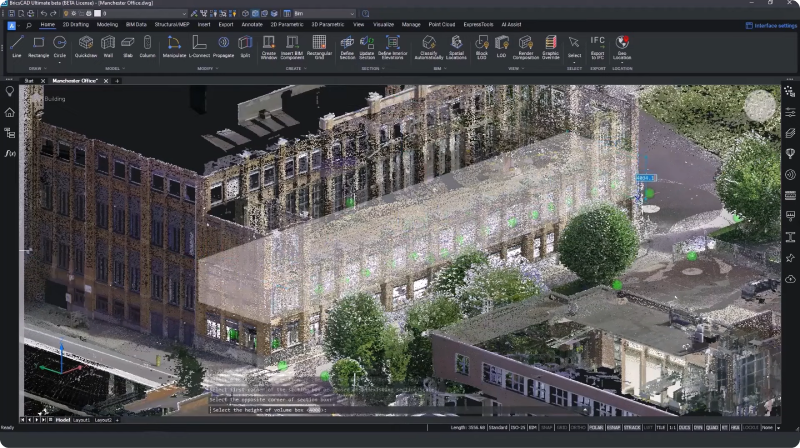
To isolate the portion of the building we wanted to work on, we used our standard BIM tools to create volume sections. Once we defined the section area, we input the height of the box and double-clicked on it to open the section.
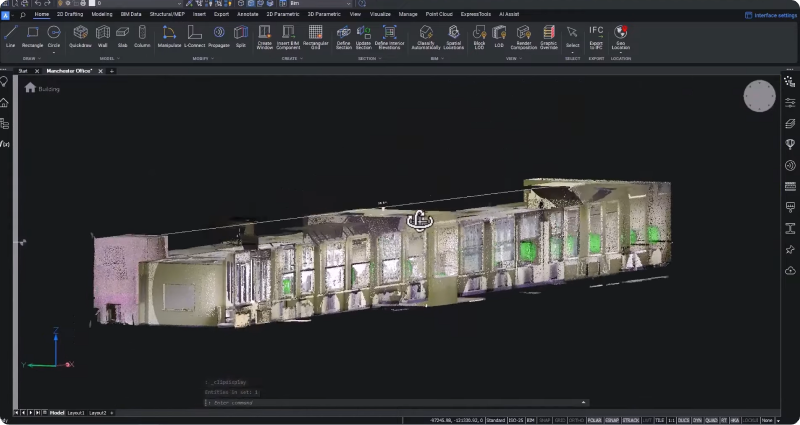
Tip: We suggest you fully isolate the point cloud area representing the rooms you want to model. This isolation will improve the accuracy of room detection later.
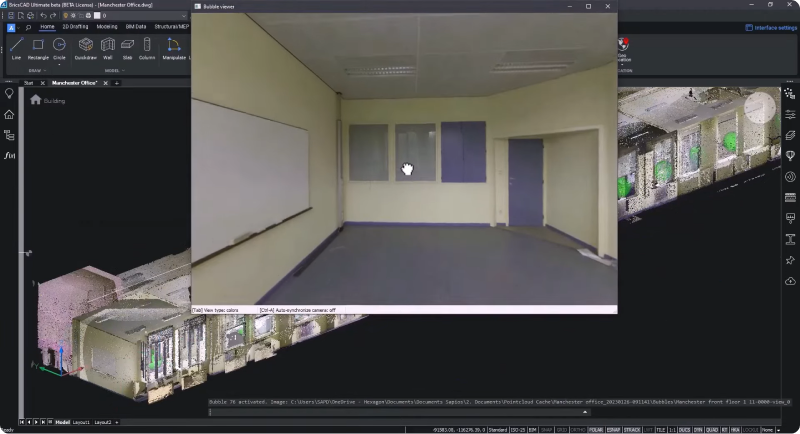
You can also open up the bubble views generated by the scanner to double-check the isolated geometry.
Point Cloud Classification in BricsCAD® BIM V24
The new Point Cloud Classify tool classifies the visible points into different classes, so you can easily hide and isolate different parts of the Point Cloud file.
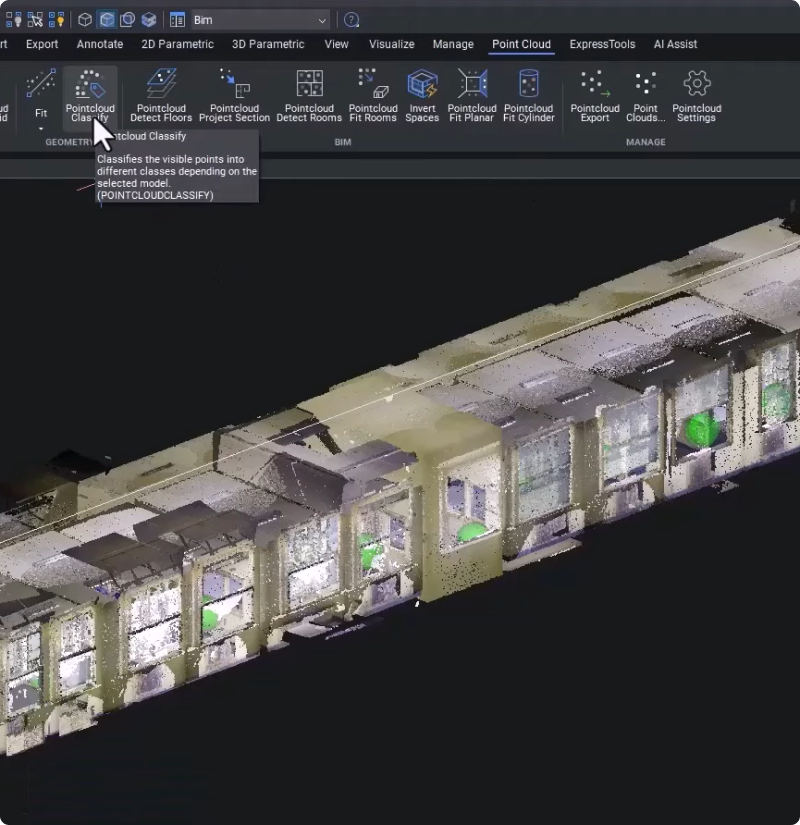
- Navigate to the Point Cloud tab on the ribbon to use this tool.
- Click on the Pointcloud Classify button.
- Alternatively, insert the POINTCLOUDCLASSIFY command.
- Now, you can select the required classification mode.
- In this example, we chose Indoor Simplified.
- Once the classification is complete, open up the Point Cloud Manager side panel and unfold the newly created classes.
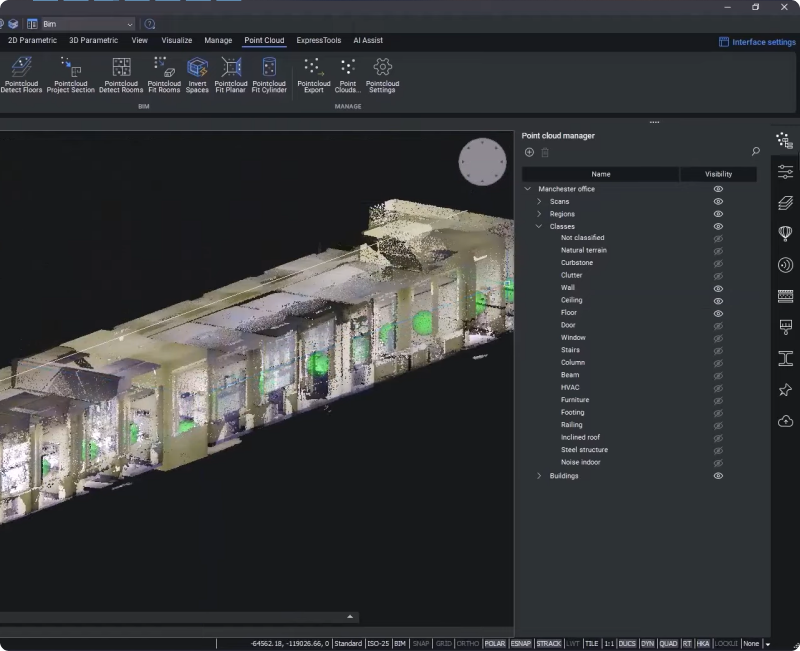
Now, you can hide unwanted scanned objects and only isolate the ones necessary for the renovation. In this case, we want to isolate the walls, the floors, and the ceiling.
This way, you can easily hide and isolate specific objects and areas of our point cloud.
Detecting Rooms in a Point Cloud in BrisCAD® BIM V24
With the Point Cloud Detect Rooms tool, you can detect rooms fully in the volume selection.
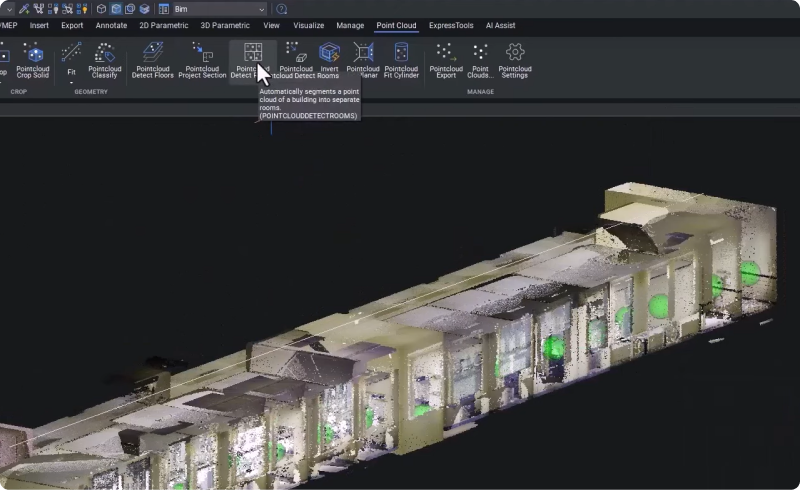
- Navigate to the Point Cloud tab on the ribbon to use this tool.
- Click on the Pointcloud Detect Rooms button.
- Or, insert the POINTCLOUDDETECTROOMS command.
Define the building number (1 in this example), and the floor number (3), and the detection process will run in the background. BricsCAD will notify you once it detects the rooms.
Once the process is complete, open the Point Cloud Manager side panel, and you can see that it has detected rooms under Building 1 and Floor 3.
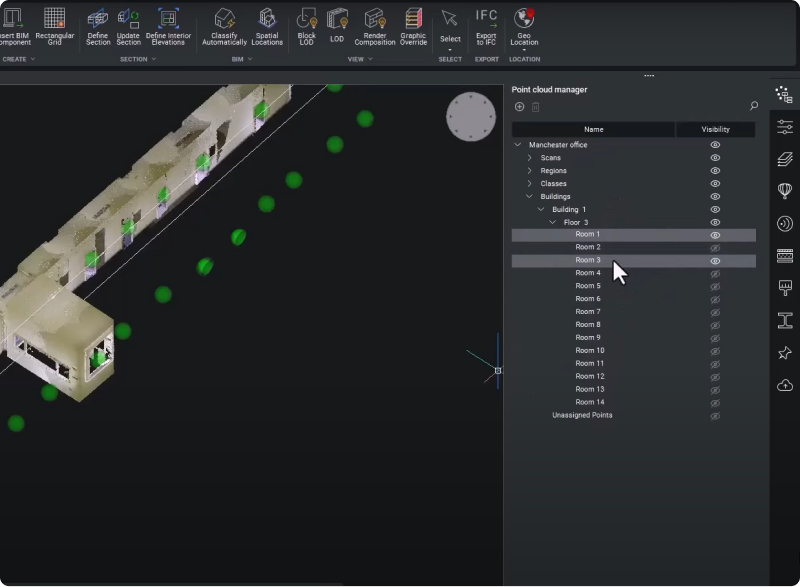
Now, you can isolate each room individually to assess the results.
Rooms 1 and 3, in this example, are part of the bigger floor corridor. To merge these, we selected both rooms using the control key, right-clicked, and chose "Merge Rooms."
If you want to rename a room, you can right-click and rename it - we renamed this one "Corridor."
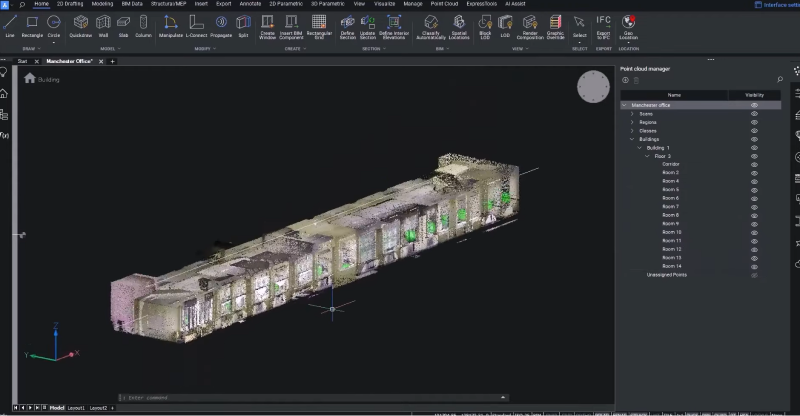
Now, you can make the rest of the rooms visible to confirm the detection.
Point Cloud Fit Room tool
You can use the new Point Cloud Fit Rooms feature to specify which rooms to include in the modeling process.
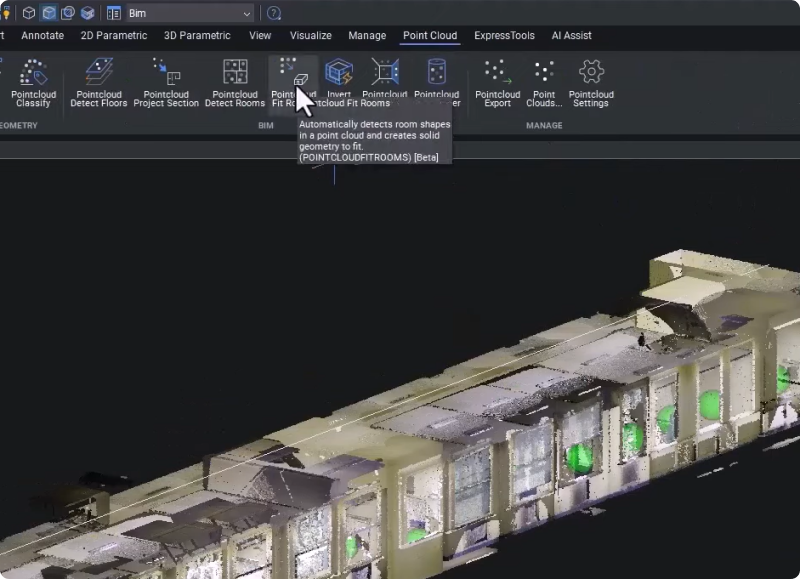
- Navigate to the Point Cloud tab on the ribbon to use this tool.
- Click on the Pointcloud Fit Rooms button.
- Or, insert the POINTCLOUDFITROOMS command.
We selected all of them and restricted the detection to perpendicular walls.
You'll see a new layer is added to your list when the process is complete.
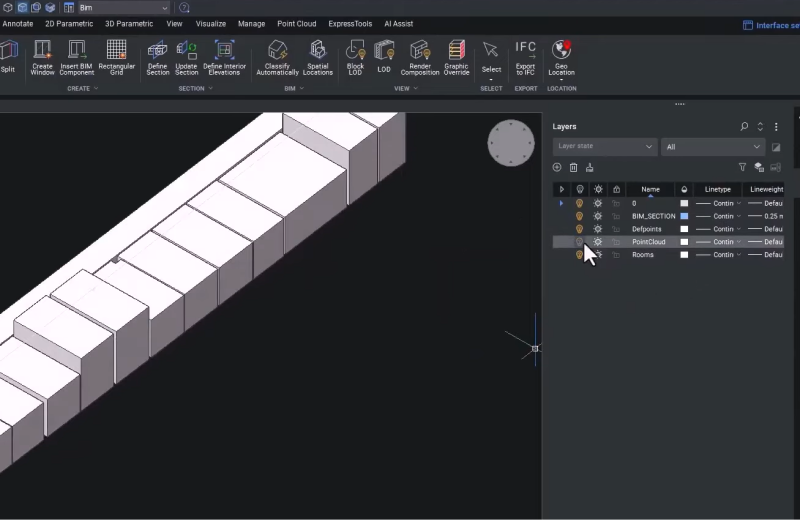
The "Rooms" layer contains the 3D solids representing the volume of each room.
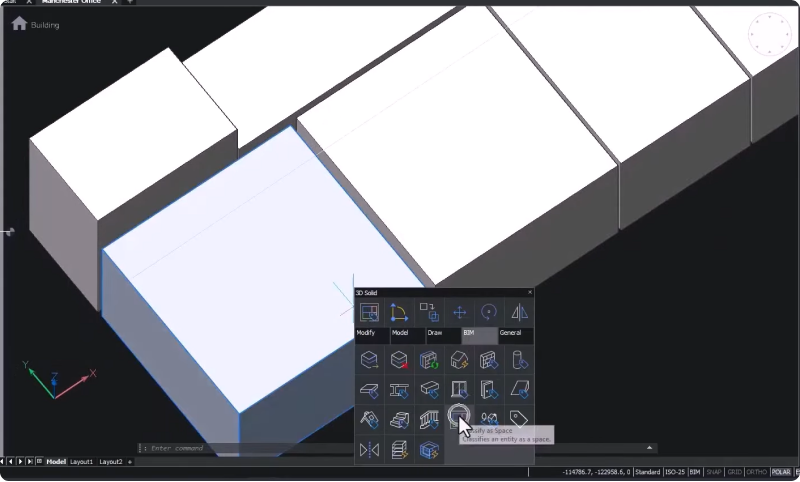
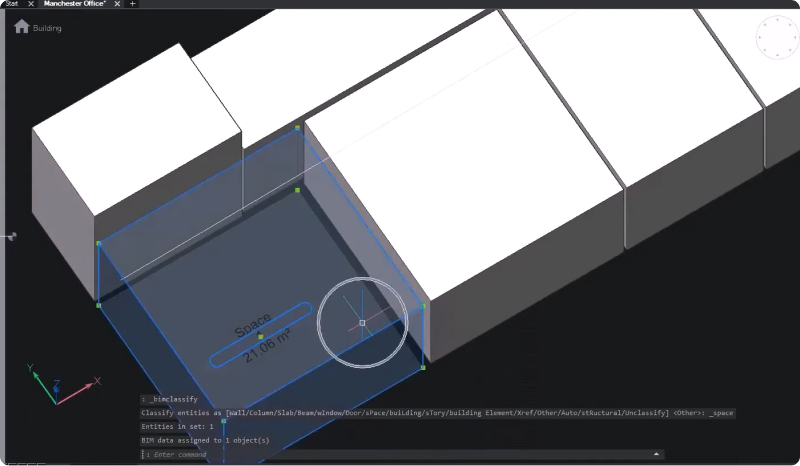
Tip: You can always classify those 3D solids as BIM spaces. This way, you can select those spaces by visiting the properties panel, and under "Space Base Quantities," you can list all the vital room information you may require, like the square meters of the floor and the walls.
For the final step, we will use those 3D solids as input solids to invert the geometry and create our building story.
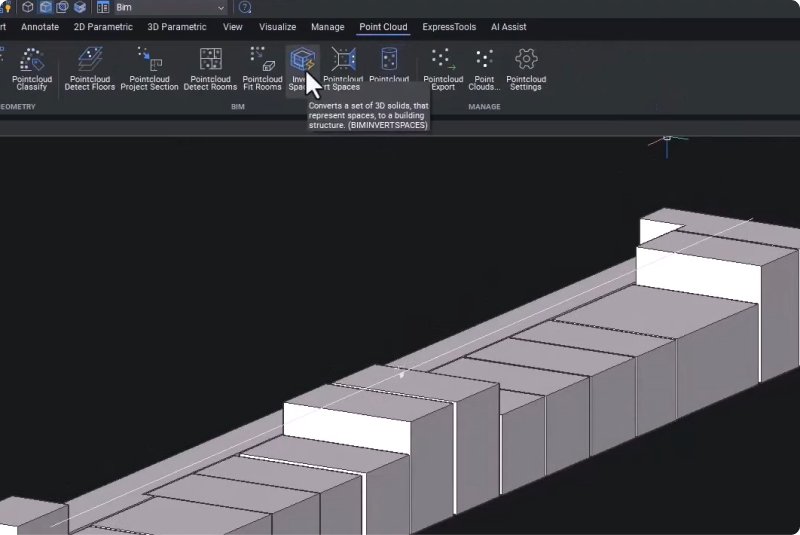
- Navigate to the Point Cloud tab.
- Choose the "Invert Spaces" tool.
- Or, enter the BIMINVERTSPACES command.
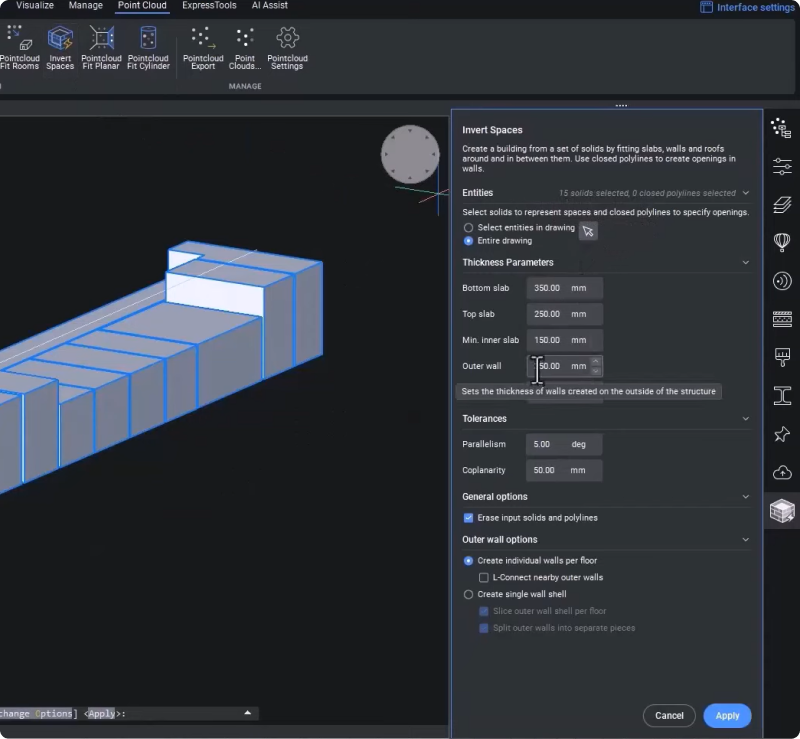
On the side panel, you can see the Invert Spaces tool identified 15 solids. We input the desired thickness parameters like the slab and wall thickness, ticked the "Erase input solids and polylines," and clicked "Apply" to begin the inversion.
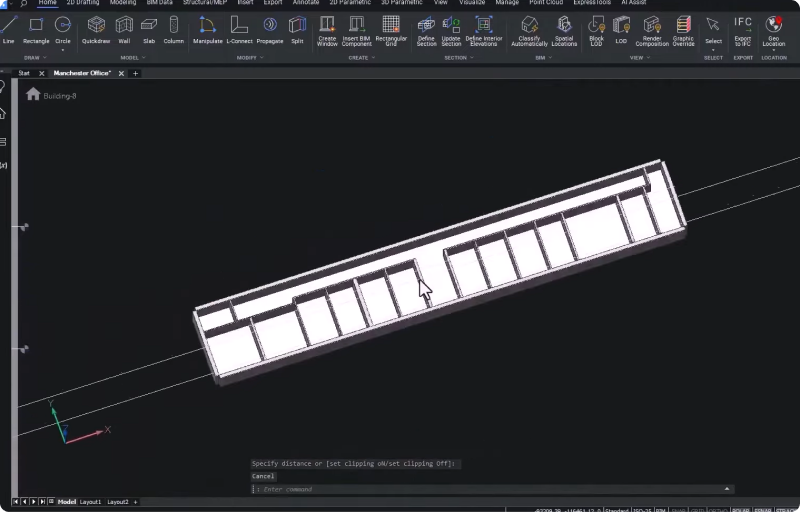
We have gone from a point cloud file to a 3D building model in three steps!
Let's take a closer look at the model.
Visit the Home tab and create a section along the XZ plane.
Now, you can start using BricsCAD BIM's Building Tools to raise the model's level of detail.
Calculate normals from structured point clouds
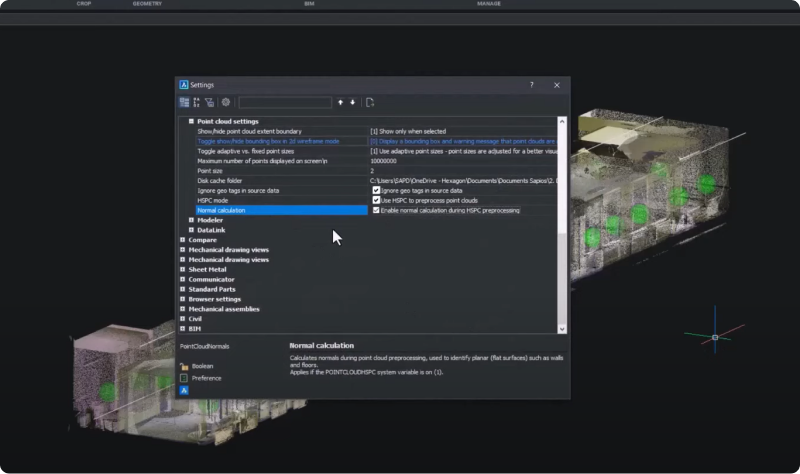
Lastly, we have implemented an HSPC point cloud normals feature. Now, you can calculate normals for structured point clouds already available in the cache in HSPC that do not have normal vectors yet.

When the normals have been calculated, they will be added to the HSPC file.
- Open the Pointcloud Colormap to view the results.
- Under color stylization, select "Normals."
- Now, the point colors change according to their XYZ plane alignment.
Whether you're a surveyor, general contractor, or engineer, BricsCAD BIM V24's new scan-to-BIM automation tools will prove an excellent addition to your toolset and accelerate your scan-to-BIM workflows!
There's plenty more in BricsCAD V24, so watch our Breakout Sessions for an in-depth look at some of these new features!
Watch the video!
Watch the Breakout Session over on the Bricsys YouTube channel to see the BricsCAD V24's Scan-to-BIM automation tools in action!
Want to learn more about BricsCAD® V24?
If you're curious about what else you can do in BricsCAD V24, check out our YouTube channel or take a peek at the rest of the Bricsys blog to learn more!
Have you used BricsCAD® V24 and have some ideas or suggestions?
Fantastic! We love hearing your thoughts on BricsCAD® – all feedback is welcome, whether good or bad. The best way to tell us what you think about BricsCAD is to send us a support request; our support team will gladly help.
Get started with BricsCAD® V24 today!
Buy BricsCAD or download the 30-day free trial now and discover how you can accelerate your time to deliverable with BricsCAD.
