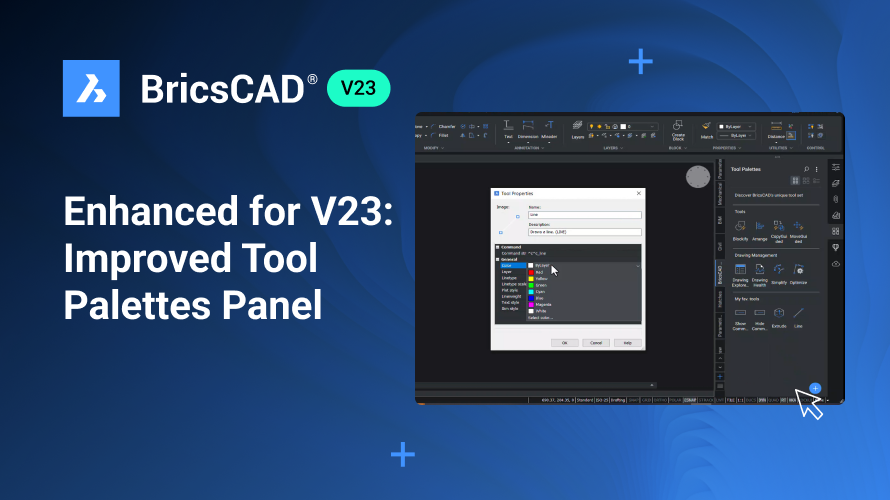
We have revamped the Tool Palette panel in BricsCAD V23 for an improved user experience. You can use the tool palette panel in BricsCAD to access blocks, hatches, and command tools from a central location. Let's take a look at how you can use them!
How to access the tool palette panel in BricsCAD:
To access the tool palette panel, you can either enter the tool palette command (TOOLPALETTES) , or click the Tool Palette icon in the tools panel.
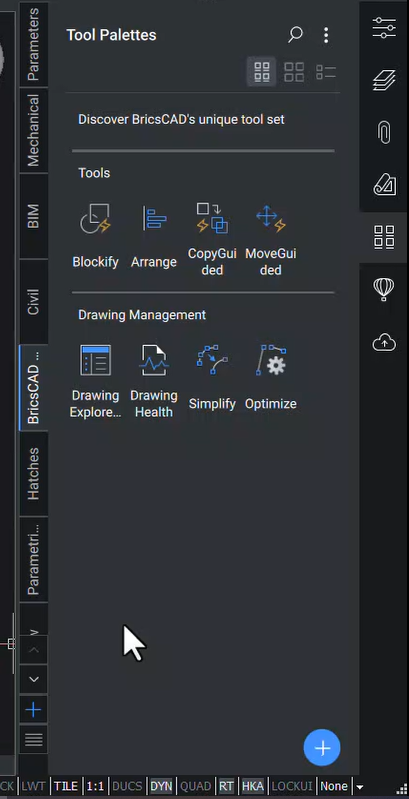
In the Tool Palettes panel, you can see various tools grouped in palette tabs, while the current palette in the tab is highlighted with a blue line. Some tab names may not be completely visible; you can see the full name by hovering over the tab. You can view hidden tabs with the up and down arrow keys.
The Tool Palette's panel categorizes the various tools so you can easily access frequently used commands. For example, if you click on the BIM tab, you see the most frequently used BIM tools, categorized according to their application. You can access a command by clicking on its icon.
How to create a new tool palette
To create a new tool palette, right-click on the tool palette.
Choose the "New Palette" option.
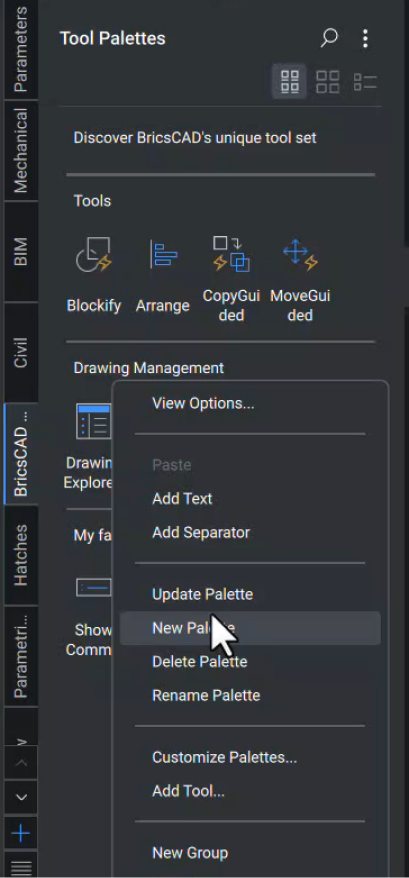
Name the palette.
Click on "Add" .
You now have an empty tool palette that you can fill with the tools of your choice.
Right-click on the palette tab and click on "Rename Palette" to rename it.
Click on "Delete palette" to delete it.
Managing Tool Palettes
Managing tool palettes in BricsCAD is simple. You can copy tools from one palette to another and rename or delete them. Let's say you want to copy the Quick Draw tool to another palette.
Right-click the Quick Draw tool in the BIM tool palette, and select "Copy."
Activate the BricsCAD tab, right-click, and click on "Paste."
To rename it, right-click the icon and click "Rename" to enter a new name.
If you want to delete it, right-click the icon and select "Delete."
Searching for a tool
To search for a specific tool, click on the search icon in the upper right-hand corner of the tool palettes. When you search for a tool, only that particular tool will appear. To see more options, click on the three vertical dots, and a context menu with other options will appear – like add text, separator, update palette, or new palette. You can also access the same options by right-clicking on the tool palette.
To control the display of the tools in the palette, use the three icons on the top right-hand side, below the search icon. Choose from tool, icon, label (the default view) icon only, and list views.
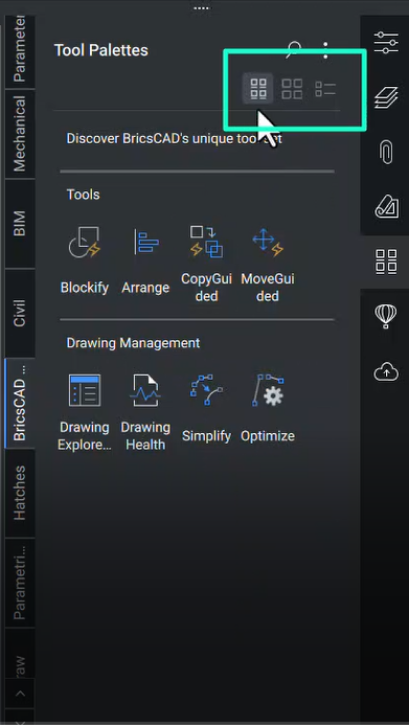
You can also add a separator, text, or tool by using the plus icon on the lower right corner of the panel.
Click on "Add Separator" to add a separator in the panel.
Click on "Add Text" to add a custom text.
Click on the "Add Tool" option to add a tool to the tool palettes.
The Customize dialog box will appear, with tools categorized across various tabs (Menu, Toolbars, Ribbon, Keyboard).
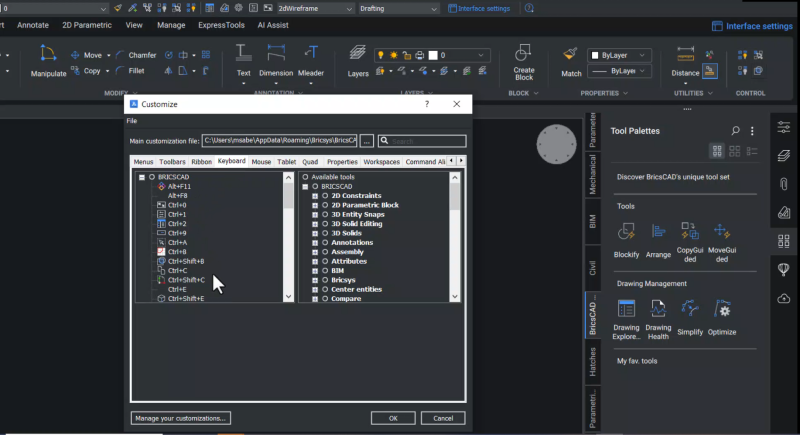
You can also search for a specific tool using the search bar in the dialog box. Once you've found the tool you want, you can add it to your palette.
Adding to your Tool Palette
Select your chosen tool.
Right-click and select “Add to Current Tool Palette." The tool will now appear in your palette.
To execute the command, click on its icon.
How to create entities with predefined properties
Click on the +
Select "Add Tool".
Under the Menu tab, click the + sign beside "Draw."
Click on "Line," and you will see a list of entities on the right side of the panel.
Now that the menu tab is active click the + to expand "Draw".
Click on "Line"
Right-click and choose "Add to Current Tool Palette."
Click "OK"
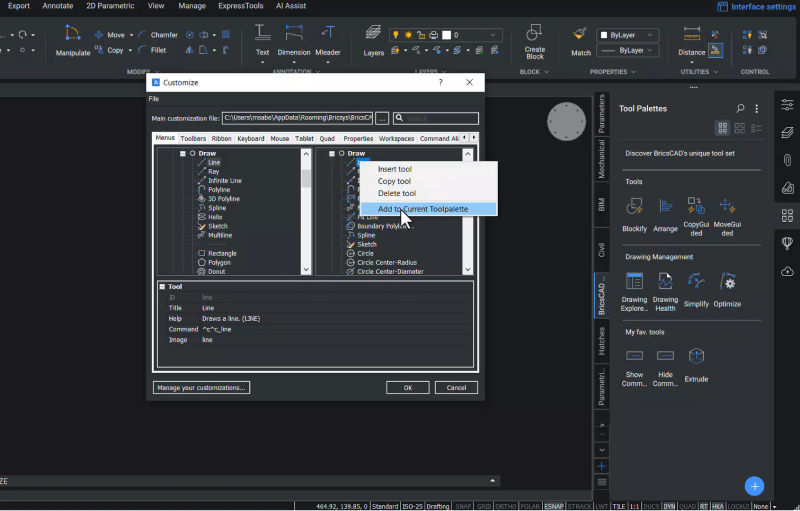
Now, you need to create a new layer.
Click on the layers icon in the tool panel.
Click the + button to add a layer
Rename the layer
Now, go back to your tool palettes and select the line tool you added previously.
Right-click, click "Properties," and you can change the line's properties. For example, you can change the line color.
Choose the layer you created and renamed, and click "OK."
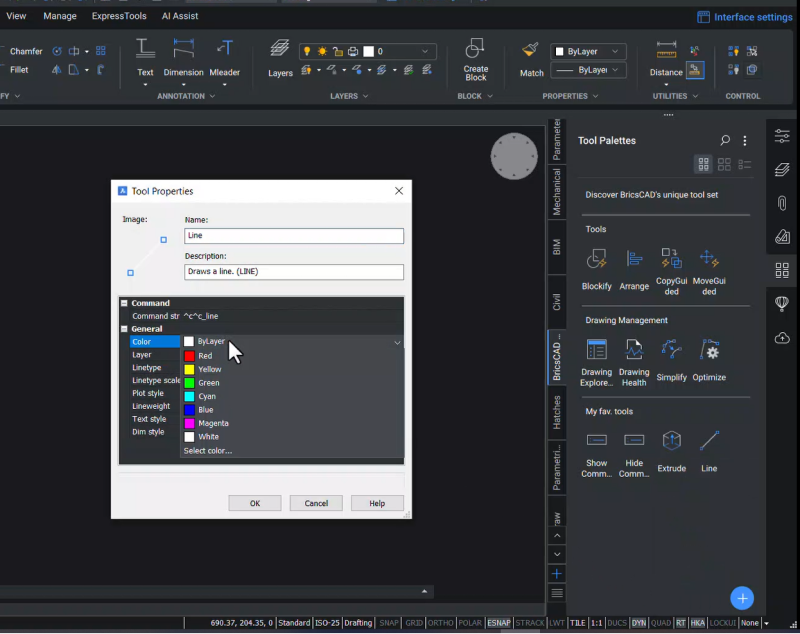
- Click on the line tool to start the line command. Now when you create a line, this particular line will have the chosen predefined properties.
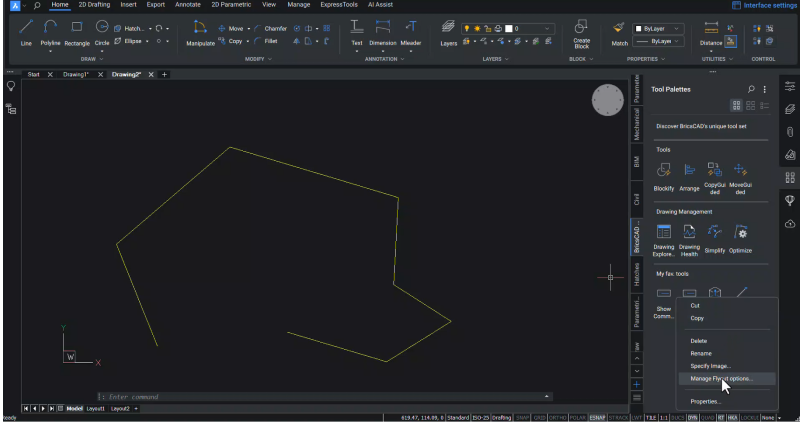
You can use these predefined entities across various drawings. If you open up a new drawing and create a line using the line tool in your tool palette, you will see that the line carries the predefined properties you gave earlier.
Creating a flyout
You can also create a flyout on the line tool.
- Click on the line tool in your tool palette, and click on the "Manage Flyout" options.
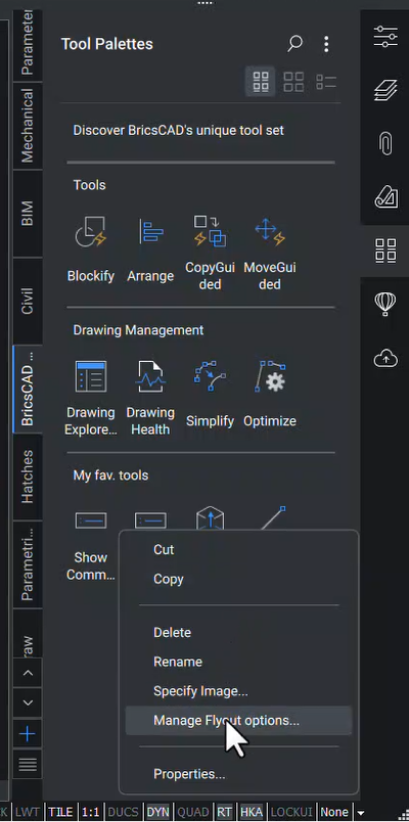
In the Flyout Options panel, click the Enable flyout slider to blue .
Choose which entities to keep in the flyout by unchecking any options you don't want to include.
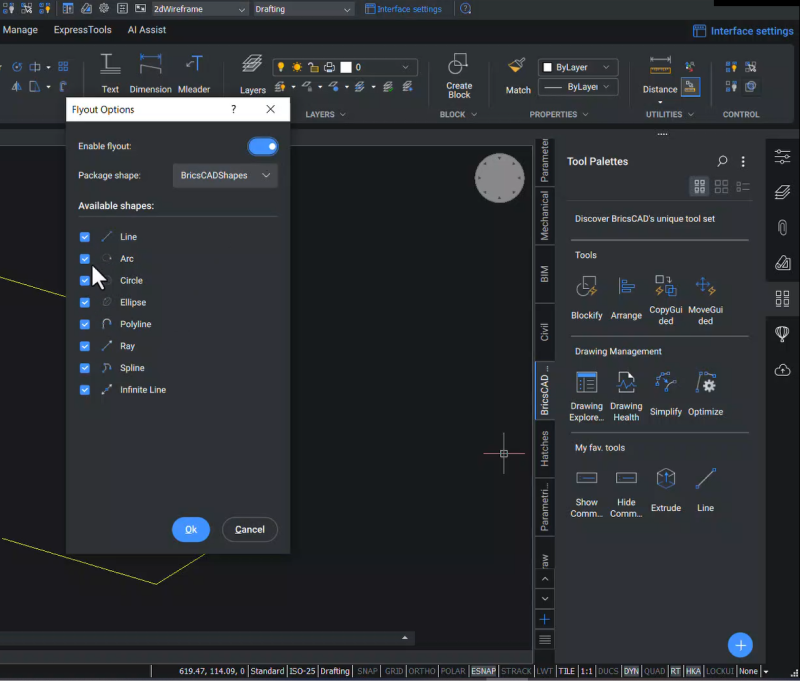
- Click "OK"
Now, when you click on the line tool, there is a flyout, and you can choose any entity from the entities in the flyout. For this example, let's choose a polyline.
- Click on "Polyline," and you can now create a polyline.
And that's it – you're all caught up on the improved tool palette in BricsCAD V23.
Watch the video!
Check out the YouTube tutorial to watch the Improved Tools Palette in action!
Have you used the improved tool palette and have some ideas or suggestions?
Fantastic! We love hearing your thoughts on BricsCAD® – all feedback is welcome, whether good or bad. The best way to let us know what you think about BricsCAD is to send us a support request; our support team will gladly help.
Want more BricsCAD tips and tricks?
If you're curious about what else you can do in BricsCAD, check out our YouTube channel to learn more about BricsCAD's features and commands or take a peek at the rest of the Bricsys blog.
