In the last stop of my BricsCAD Shape Journey, we looked at the user interface, feel free to go back and refresh your memory if you get lost. During this stop, we will look at how to use some of the basic BricsCAD Shape commands. Even if you're an absolute CAD beginner, you should be able to keep up!
2D BricsCAD Shape commands
BricsCAD Shape supports 2D vectors. They work exactly the same as in software such as Adobe Illustrator® or Inkscape. This means that anything you draw in BricsCAD Shape is scalable to any size. That's because its geometry is mathematical and not limited by pixels.

BricsCAD Shape provides a selection of 2D 'primitives' to get you started: Rectangle, Polygon, Circle, Arc, and Ellipse. To access them: click the rectangle icon in the Toolbar (see -- workspace blog post). A drop-down menu will display. Then simply set the position of the primitive in the workspace by clicking.

Handy tips for 2D primitives in BricsCAD Shape:
- After selecting the polygon primitive you will need to first manually enter the number of sides (check the Commandline see -- workspace blog post). Only then can you set the center point.
- Hold Shift to keep the shape orthogonal (at a right-angle).
- Primitives automatically align to the x-y plane (they draw along the 'ground').
- Click the center of the LookFrom Widget (see -- workspace blog post) to get a top-down view of the drawing space.
- Use the blue boxes to manually enter the dimensions. Hit Tab to switch between the boxes.
You can also create your own shapes using the Line and Polyline tools. The button for these is located on the toolbar to the right of the rectangle icon. Learn more about Polylines.

Quick tips for polylines in BricsCAD Shape:
- To create a curved polyline use type arc (after the first point has been set).
- To return to a straight line type 'line'.
- Use the blue boxes to manually set the length and angle. Hit Tab to switch between boxes.
- Type 'close' to create a closed polygon or click the starting point of the polyline.
3D BricsCAD Shape Commands
What's the first thing any CAD beginner wants to do? Create a 3D box of course! The good news is that BricsCAD has a command for this, rather handily named 'Box'. You can find the icon in the Toolbar. It's also known as a 'primitive'.

If you click on the icon you'll see a drop-down menu appear. Here you'll find a selection of other 3D primitives; Pyramid, Wedge, Cylinder, Cone, and Sphere. To use any, simply click the icon you want to use, then choose its location and dimensions.

You can manually enter the size of the box by typing a value into the blue boxes. Hit Tab to shift between the boxes.
Customizing 3D Shapes
The primitive shapes are great but it's a little limiting! What if I wanted to create a hexagonal prism? Well, no problem! We can use the Extrude command
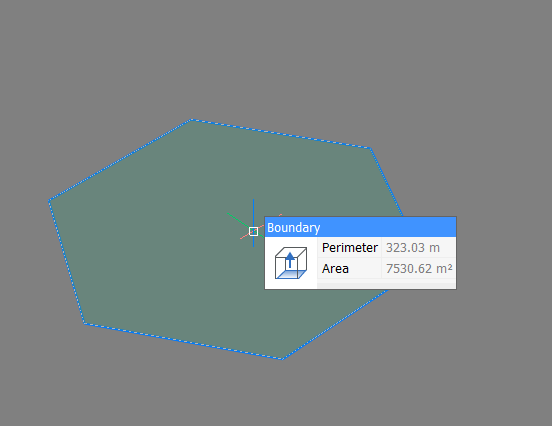
- Start with a 2D, 6 sided polygon (see above).
- Hover over the inside of the shape, (it will turn green) OR hover over the polygon (it will turn blue). A small icon for Extrude should appear under your mouse. This is 'The Quad', we'll cover that soon. It should look something like this:

- Click it. You will now be able to 'pull' the shape out.
- Click to set the height. You can manually set the height and taper angle by entering it in the blue boxes hit Tab to switch between.

Did you know? -- You can use the extrude command on any flat surface, polyline or boundary. Give it a try!
QuickDraw
If you played The Sims™ as a child, you'll love QuickDraw! The icon is located on the Toolbar, on the far left. Simply click and drag to draw your rooms at super speed. Combine this with the PolySolid tool (located next to the QuickDraw tool) to create some really cool rooms. The PolySolid tool works in a similar way to polylines.

Use QuickDraw to get your modeling up and running...well, Quickly!
Tips for polysolids: in BricsCAD Shape
- Hit Ctrl to change the alignment of the wall

- Draw curved walls by typing 'arc'
- To go back to straight lines type 'line'
- Manually set dimensions by typing into the blue boxes. Hit Tab to switch between boxes.
- Hit Enter when you have finished drawing to set the wall height.

Learn more about polysolids in BricsCAD Shape.
What's Next?
Hopefully you no longer feel like a CAD beginner after this guided tour of the BricsCAD Shape commands. Join me next time when I will be showing you how to select entities within the workspace.
Download BricsCAD Shape Free
Watch the webinar "BricsCAD Shape in 10 minutes"


